The History of The Door

Most of us take doors for granted. They are simply a means to enter and leave a premises. However, these very same items are associated with a rich and sometimes surprising history.The History of The Door

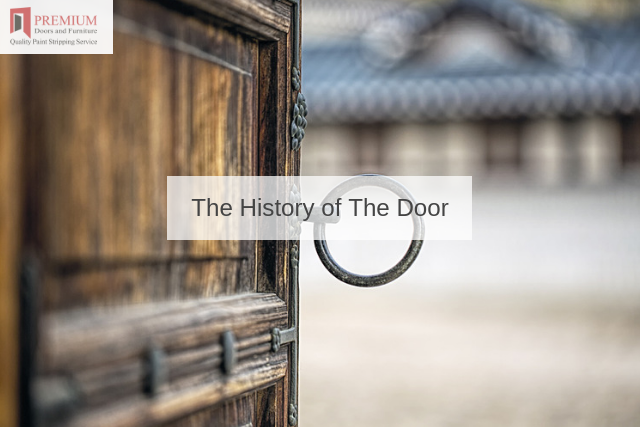
How long have doors existed? How has this technology evolved over the millennia? What important milestones have occurred along the way?

If you have ever wanted to know more about these absolutely essential objects, the information found below will come in handy.

Ancient Origins

Believe it or not, the history of the door can be traced as far back as 3,000 BCE. Archaeologists found the first traces of wooden doors in Europe during this time and naturally, their main intention was to provide a sense of security to property owners.

The Chinese likewise began adopting stone doors during the second millennium BCE. It seems that this technology was purely functional during these times.

However, more ornate doors likely graced the homes of the wealthy and those in positions of authority.

A prime example of this can be seen in an olive door overlaid in gold that was utilised within the temple of Solomon in Jerusalem (587 BCE).

Technology Enters into the Picture

As civilisations continued to develop, functionality began to be replaced with a sense of convenience.

For example, it is thought that the Greeks were the first society to invent the foot-activated door in the first century AD.

Further evidence of this advancement can be seen in a similar Chinese design that has been dated to the fifth century.

Having said this, such innovations were effectively halted during medieval times and thanks in no small part to the plague which ravished Europe.

It would not be until the 19th century that the modern door as we have come to know it finally entered into existence.

The Modern Door

While the appearance of doors became more ornate during the 19th and 20th centuries, the use of other materials signified that they became more affordable.

An American chemist invented the first polymer door in 1909 and fibreglass models entered into existence during 1932.

These materials were used to mimic the appearance of wood and their presence continues into modern times.

Do you have an old door that requires a professional restoration? Why not let its history shine through with the help of Premium Door Stripping? Please give us a call to learn more.

What is Neutralising and Why It is Needed

Stripping paint or varnish from a door or similar piece of furniture involves a number of steps. One of the most overlooked concerns involves the importance of what is known as a neutraliser.What is Neutralising and Why It is Needed

While it is always important to choose the best varnish remover for the requirements at hand, the subsequent presence of a neutralising agent will help to ensure that the item in question is successfully restored to its former glory. Let’s take a closer look.

What is a Neutralising Agent?

Many paint and varnish strippers employ harsh chemical agents in order to remove stubborn layers.

The main issue is that these very same chemicals can actually begin to damage the wood if they are allowed to remain on the surface for extended periods of time.

This is even more relevant when referring to porous woods, as they can easily soak up such substances.

A neutraliser is essentially a chemical compound that is used to halt the action of any active ingredients found within the paint or varnish stripper. As you might have imagined, the type of neutralising agent will vary.

This depends upon the stripper that you are using. One example of a household neutraliser is acetic acid (common white vinegar).

This is often employed due to its acid content, as it can counteract the caustic nature of some paint strippers.

Why Choose a Commercial Neutraliser?

Many at-home paint stripping tasks will involve the use of chemicals such as turpentine or caustic soda. However, the most effective strippers on the market today are normally comprised of a number of chemicals (such as methylene chloride or a compound known as NMP).

It they are allowed to remain on bare wood, damage will inevitably occur. This is why commercial neutralisers have been specifically formulated to counteract their effects. Do-it-yourself solutions will simply not make the cut.

Some paint stripping projects are naturally more challenging than others; especially if you are dealing with very old or ornate items.

This is why it is prudent to contact our team and procure a premium door stripping service. You can, therefore, remain confident that stunning results are only moments away.

Paint Stripping FAQs

Paint stripping is just as much of an art form as it is a science. This technique can be used to restore the wooden surfaces of doors and other items to their former glory and it is often employed by those who wish the original designs to shine through. In order to tackle any upcoming project efficiently, it wise to address some frequently asked questions.Paint Stripping FAQs

Why is Caustic Soda Sometimes Used?

Caustic soda is a chemical that is often employed to unblock drains. However, caustic soda and paint stripping enjoy a unique relationship. This substance will cause paint to detach from the underlying surface; providing a more aggressive means to deal with stubborn tasks.

Can Mechanical Devices be Used?

Rotary and belt sanders will help to expedite the stripping process. Different grits of sandpaper can likewise be employed to address different types of paint.

These are very popular when dealing with smooth surfaces although mechanical sanders are unable to address small grooves and ornate designs.

Will I Need to Use Personal Protective Equipment (PPE) When Stripping Paint?

The answer will depend upon the task at hand. You should always wear a respirator and goggles when sanding paint, as the airborne particulate matter can cause health problems.

Goggles and ear protection are also recommended. If you happen to be using chemical agents, be sure to perform the task within a well-ventilated environment; preferably outdoors.

How Can I Avoid Damaging the Underlying Wood?

Sanding and scraping the surfaces by hand is the best way to ensure that you do not mar their appearance. Using a high-grit sandpaper can likewise cut down on any potential scratches or gouges.

However, there are also times when it is better to utilise commercial chemical solutions. These help to loosen and remove paint while leaving the original surface untouched.

Some stripping projects are obviously more challenging than others. If you are uncertain where to begin or should you be dealing with an extremely old item, it is always wise to contact Premium Door Stripping for further advice and professional guidance.

How to Remove Stubborn Mould from Wooden Furniture

Wooden furniture, appreciated for its natural allure, is particularly susceptible to mould growth. This menace, more common in damp environments, can weaken the integrity of your favourite pieces over time.

If left unchecked, it can result in irreversible damage. Being equipped with the right knowledge about mould removal techniques is crucial. But what expert insights can we turn to for guidance?
How to Remove Stubborn Mould from Wooden Furniture

Preparing for Mould Removal

Mould removal is a task that needs to be approached with care. Donning gloves and a face mask is crucial to protect yourself from health issues caused by mould spores. Certain mould types can cause respiratory problems, skin irritation, and allergies. Therefore, personal protective equipment is non-negotiable.

Cleaning outdoors, or in a well-ventilated area, can prevent the dissemination of mould spores, stopping them from infecting other furniture items in your home. Additionally, given that several cleaning agents, including bleach, can release toxic fumes, cleaning in an open space ensures good ventilation and reduces the risk of inhaling these harmful substances.

It’s worth noting that established companies offering professional door stripping services in Southampton and other places follow these safety measures. Following their expert lead can protect you and your furniture during the cleaning process.

The Cleaning Procedure

Mould removal from wooden furniture can often be tackled at home using everyday items. Here is a simple, step-by-step guide to help you through the process.

Step 1: Identify and Assess the Mould

Start by identifying the mould-affected areas. Evaluate the severity of the mould growth. If it’s mild to moderate, you can handle it yourself. However, for more serious infestations, consider enlisting professional help.

Step 2: Prepare Your Cleaning Solutions

Prepare two cleaning solutions. For milder infestations, mix a simple solution of warm water and a mild detergent. For more stubborn mould, prepare a vinegar solution by filling a spray bottle with white vinegar.

Step 3: Prepare for Cleaning

Don your gloves and mask. Ensure your workspace is well-ventilated, preferably outdoors, to avoid mould spores spreading indoors and to ensure you are not inhaling potentially harmful fumes from the cleaning agents.

Step 4: Start with the Mild Solution

Start by applying the warm water and detergent solution to the mould-affected areas with a scrubbing brush. Scrub gently to avoid scratching the wood. Wipe the area with a clean, damp cloth to remove the mould and cleaning solution.

Step 5: Use the Vinegar Solution if Necessary

If the mould proves stubborn, spray the vinegar solution onto the affected areas. Let it sit for an hour. Then, wipe the area with a clean, damp cloth.

Step 6: Tackle Stubborn Mould

For extremely stubborn mould, prepare a stronger solution:

1.2 litres of water
591 millilitres of bleach
59 millilitres of detergent
Apply this solution with a scrubbing brush. Scrub gently to avoid damaging the wood’s surface and finish. Avoid getting this solution on coloured fabrics or surfaces that might be bleached or discoloured.

Step 7: Rinse and Dry

After treating your furniture, rinse the area thoroughly with clean water to ensure no residual cleaning agent is left. Pat the area dry with a clean towel and then let the furniture dry completely in an airy, warm area.

Step 8: Check for Remaining Mould

After the furniture is completely dry, check for any remaining mould. If you still notice mould, repeat the cleaning process.

When to Enlist Professional Help

While the methods described can be effective for mild to moderate mould infestations, there are situations where professional help becomes necessary. If you’re unsure of the right cleaning process, worried about potential damage to antique wood, or dealing with a severe mould problem, seeking professional help is advisable.

Companies like Premium Door Stripping offer expert services, employing teams with specialised knowledge in dealing with mould on wooden furniture. They provide targeted solutions, use professional-grade tools and solutions, and are trained to handle and preserve a wide range of wood types, including antique ones. With their help, you can ensure your cherished wooden furniture pieces are effectively saved from the damaging effects of mould.