A Guide on The Best Way on Finishing Oak Objects

Oak has a cellular structure that makes it ideal for soaking up a variety of stains, though you should always prepare the item before doing this step.

There are several things you can do to get your oak project ready for finishing. Once complete, you will love the contrasting tones that oak shows when it’s stained and will be proud to showcase the item anywhere in your house.

Consider a Minimal Look

One of the great things about oak is that it has a lovely grain and looks wonderful in its natural state.

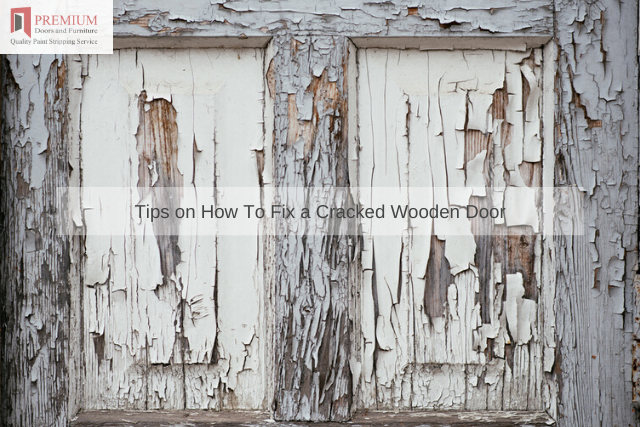
After furniture stripping is complete, you will see the way that your oak door, or other projects, has a beautiful look that you can enhance with your stain. Premium door stripping is especially important because it prepares the door for looking its best and being ready to hang when you’re finished.

Sand Properly

One of the most important things you can do to finish your oak project, including a door, is to sand it properly. The goal is to make sure you don’t end up with sanding lines, which can be seen once you stain the wood.

You will want to progressively move to finer grit sandpaper as you go. The more well sanded the door is, the better it will look when it’s finished.

Apply a Finish

There are two reasons to apply a finish to your oak. One is protection and the finish works by filling the grain so that other debris and gunk can’t settle in there.

This will help the project look finished for many years to come. The other reason is for the oak’s appearance. The finish will help highlight the oak’s grain and keep it from looking raw.

Final Finishing Steps

To complete your oak door, you can apply a stain to bring out the wood’s grain and create the colour you want.

You can also paint an oak door, something that is becoming increasingly popular on your front door but is also ideal for a home’s back door.

Another option is to apply a clear coat, which you can do with wax or oil. Shellac or varnish are other possibilities.

Finishing your oak is important for creating a door or other product that looks great and functions as it should. With so many options, you should be able to create the look that you love.

A Guide To Wood Treatment Oils & Where to Use Them

Have you been looking to protect your wood from damage while simultaneously bringing out its natural beauty? If so, the use of a high-quality treatment oil is an excellent idea.

Unlike other options such as stains or varnishes, wood oils are comprised of all-natural ingredients. Thus, they will never damage the underlying surface.

As you may have imagined, there are a variety of oils available and each of these is designed for a specific purpose. This is why the experts at Premium Door Stripping have put together an informative guide.

A Quick Look at the Types of Wood Oils

There are several different varieties which you can purchase. Here are the most common:

  • Teak and Danish oil
  • Linseed oil
  • Mineral oil
  • Tung oil

Determining which type to employ will depend upon several factors. For example, teak and Danish oils are known for their fast drying times as well as providing a highly resistant finish.

Linseed,Oil
Linseed Oil

Linseed oil offers a lustrous finish although multiple coats need to be applied and they require a significant amount of drying time. Also, Linseed oil cannot be used on outdoor furniture.

Mineral oil is a common option due to the fact that it can be purchased at a local chemist.

Mineral Oil
Oil Sample in Mineral Oil under UV Light

It can be employed on everyday items such as cutting boards or cabinets. Tung oil is considered to provide the most stunning results as well as an amazing lustre.Tung Oil

It is best to expose the natural surfaces before applying any of these oils. This could involve stripping the existing paint or using a varnish remover for wood.

Please note that this is only a brief overview of the types of oils at your disposal. It is best to contact a professional in order to determine which represents the best option.

The Best Ways To Repair a Rotten Door

Due to the fact that exterior doors are engineered to deal with harsh elements, even the most robust designs can suffer from rot over time.The Best Ways to Repair a Rotten Door

How can you address this situation in order to restore your door to its former glory? Let’s look at a handful of professional suggestions.

Determine the Extent of the Rot

You will first need to determine how much of the wood has rotted away. In some cases, severe damage may require that an entire section (such as a panel or a portion of the frame should be replaced).

Assuming that you have found the extent of the damage, allow the wood to thoroughly dry before moving on.

Remove Any Loose Wood or Paint

Efficient tools for paint stripping can be used to remove any loose wood that has rotted as well as nearby paint that may no longer be supported.

Be sure to adequately deal with this debris, as a bonding agent will not properly adhere if any remains.

The Use of an Epoxy-Based Wood Filler

The most common repair involves placing a malleable wood filler into the affected area.

Try to shape it so that it mimics the natural shape of the section. Allow it to dry for at least 24 hours and if you notice any shrinkage, another application could be needed.

Final Steps

When the bonding agent has dried, it can be sanded down until it is flush with the surface.

In some cases, you might also need to use a bit of caulk to fill in any remaining cracks. The affected area can then be primed and painted in order to achieve a uniform appearance.

The experts at Premium Door Stripping are always available if you require assistance or if you have additional questions, so feel free to give us a call.

How to Replace a Door Weatherstrip Seal

Weatherstripping is one of the most important components of any door. This flexible seal provides a barrier against temperature variations, moisture, drafts, and even some insects.How to Replace a Door Weatherstrip Seal

While quite durable, there are times this weatherstripping needs to be replaced due to wear and tear. Let us look at how such a seal can be quickly replaced.

Removing the Old Weatherstripping

The most common type of weatherstripping is a rubber material that takes on the form of a flange-style bulb.

First, grip the weatherstripping with your fingers (preferably at an end or a corner).

Gently pull the flange away from the groove that is found on the door jamb. Repeat this process for the vertical and horizontal sections.

Clearing Away Any Existing Remnants

While most weatherstripping can be easily removed, some types may have been affixed in place with the use of a caulking agent or tack nails.

Take a look in order to determine whether these are present. If so, cut away the caulk with a utility knife or remove the mails with a pair of pliers.

Installing the New Seal

Measure the length of the upper horizontal door jamb and cut the new weatherstripping accordingly.

Press the flange end into the existing groove until it is flush with the jamb. Repeat this process when dealing with the two vertical sides of the door. Using a utility knife, cut off any excess weatherstripping that may remain.

So, we can see that replacing weatherstripping is a relatively simple task. There are nonetheless times when more complicated projects may need to be carried out.

In such instances, it is best to contact the team at Premium Door Stripping. We will be more than happy to answer any questions that you may have before tackling a future project.

Tips on How To Fix a Cracked Wooden Door

Even the most durable wooden doors are subject to wear and tear over time. This will often be seen in the form of cracks.Tips on How To Fix a Cracked Wooden Door

Common causes include mechanical damage or temperature variations (particularly if the door is found on the exterior of your home).

However, many cracks can be repaired in order to avoid a more costly replacement.

What does this process involve? Let us quickly examine some professional suggestions.

The Initial Assessment

You will first need to determine the length and width of the crack in order to accurately view the extent of the damage.

This can sometimes be tricky if multiple coats of paint are present (these finishes may hide the extent of the issue). In such a case, it is wise to employ a quality paint stripper for wood around the immediate area.

Then, try to see whether or not the crack in question has loosened any nearby joints or panels. This leads us to the next step.

Repairing the Crack

You will first need to obtain a tube of caulk specifically designed for wooden doors. Avoid using silicone, as many paints will not adhere to this substance.

Look for a filler that is somewhat flexible so that it is able to expand and contract in accordance with any mechanical forces. Completely fill the crack and be sure to wipe off any excess with a damp cloth before it dries.

If the crack still exhibits a depression, adding fast-drying wood putty will ensure a level surface.

This putty can be sanded once it has dried, so be sure to allow at least 24 hours before taking additional steps such as applying a fresh coat of paint.

Please feel free to contact Premium Door Stripping for additional advice or if you require a professional paint stripper in order to tackle an upcoming project.

A Guide on How To Sand Louvred Doors

Does your home contain one or more louvre doors? If so, you might wish to change their appearance on occasion through a coat of paint or semi-transparent stain.A Guide on How To Sand Louvred Doors

This will often require a bit of sanding to avoid any issues during the application process.

However, the main issue is that these doors contain dozens of slats which can be tricky to address.

Let’s take a look at how to sand such doors with a minimal amount of time and effort.

Addressing the Louvres Themselves

You should first remove any hardware such as handles and locks, as these might become scuffed during the sanding process. Begin by sanding each slat in a horizontal motion; being careful to get into the crevasses on either side.

Work from the top down to ensure that all louvres are addressed. If you find it difficult to access a specific spot, there are many paint stripping tools specifically designed to reach tight angles.

Finally, run your hand over each louvre to determine if any wood burrs are present.

Sanding Larger Surfaces and the Circumference

You can then begin sanding the larger flat panels of the door. Avoid using a motorised circular sander, as this could inadvertently damage the grain.

Pay particular attention to the joints between each panel in order to ensure a smooth finish.

The last step involves sanding the exterior edges of the door. Assuming that every surface has been addressed, use a damp rag or a small vacuum to suck up any sawdust that remains.

In the event that the sanding was intended to remove paint or stain, the steps above may need to be repeated more than once.

Extremely stubborn areas might also benefit from the use of a paint stripper or a varnish remover. Of course, be sure that the agents in question will not harm the underlying wood and always read the instructions.

Can Stripping Water-Based Paint Affect the Underlying Wood?

Are you hoping to restore a section of crown moulding or a door to its former glory?Can Stripping Water-Based Paint Affect the Underlying Wood_

If so, this often involves stripping layers of paint that may have been present for decades. This can represent a somewhat involves process depending upon the type of paint, its age and the number of layers.

However, you will also need to be careful that the underlying wood is not damaged. This brings up an important question.

Could you possible harm the wood if you happen to be stripping water-based (latex) paint? Let’s examine some factors that need to be taken into account.

Issues with the Stripping Agent

While solutions such as varnish remover for wood are somewhat harsh due to the presence of chemicals such as turpentine, the majority of water-based formulations tend to be less damaging to the wood.

However, they may still contain solvents such as alcohol. This is why you should avoid allowing the stripping agent to remain in contact with the wood for prolonged periods of time.

You could otherwise encounter issues such as stains or desiccation (extreme dryness). This is particularly relevant if you happen to be dealing with a very porous wood.

Mechanical Mistakes to Avoid

Perhaps the most common form of damage results from accidentally chipping or gouging the wood during the removal process.

This is why it is best to work with blunt instruments such as a putty knife or even an abrasive pad (such as those manufactured by 3M). These will help to lessen the chances that a costly mistake is made.

Removing water-based paint from wood can be challenging and yet, the results are well worth the effort.

If you would like to obtain further professional advice, please feel free to contact a representative at Premium Door Stripping. We are always happy to help.

How to Strip Paint from Garage Door

How to Strip Paint from Garage Door

Are you hoping to restore the natural appearance of a garage door? You might instead wish to apply a few coats of stain once the overlying paint has been removed.How to Strip Paint from Garage Door

This is why knowing how to properly strip paint from the surface is always important. Let us take a look at some professional recommendations so that you can save time, effort and money along the way.

Initial Preparation For Removing Paint From A Garage Door

It is first important to wash away any loose dirt or debris that may be present with a hose or a power washer on low settings. Not only will you be dealing with a relatively clean surface, but the mechanical action of the water can help to further loosen any paint that may already be chipping. Allow at least 24 hours for the garage doors to dry before continuing.

Dealing with Loose Paint

Loose paint can normally be removed with the use of a putty knife or similar scraping tool.

Although the metal paint stripping process is rather straightforward, you will need to be more careful when dealing with wood (you might otherwise mistakenly cause a gouge).

Be sure to remove any stubborn paint from corners and crevasses, as this is where it can persist for years at a time.

Addressing More Challenging Spots

There may be some extremely stubborn locations. In this case, additional mechanical options such as the use of a rotary sander may provide adequate results.

You could also consider the use of a paint stripper (depending upon the formulation).

This will normally address the majority of paint that remains. Once all of the paint has been removed, wash the door down to address any dust or debris that may still remain.

Please contact Premium Door Stripping for additional advice or to enquire about our services.

How to Effectively Remove Paint from Brickwork

How to Effectively Remove Paint from Brickwork

Paint can be a tough substance to remove from brickwork. There are a number of ways that you may have seen people try to clean paint off their brick, but I am going to walk through the process that has been proven most effective for me over the years. It is important not only to be careful when removing paint, but also with how it will affect your brick in the future if you do not take care of it properly!

How to Effectively Remove Paint from Brickwork

Know Which Type of Paint You are Dealing With

The first step is to identify what kind of paint you are dealing with. It may be worth taking a test spot and seeing if the paint comes off easily before trying to remove it from all over your brickwork, just in case! Brickwork paint is made to be very durable and stubborn, so we need to take the necessary time and care to remove it.

It is also worth checking if any finishing products have been applied to the brickwork. If so, do not attempt to remove it as these products will have been used for a reason and could damage your brick!

Mechanical Methods

One of the advantages of stripping paint from brick is that the underlying material is quite hard. Therefore, the use of a pressure washer is recommended.

These jets of water will help to loosen any paint on the surface and if you are lucky, no further chemical treatments will be required. Be sure to use a tip equipped with an angle at least 45 degrees, as extremely narrow jets may damage the underlying brick.

This method can also be used if you wish to strip paint from radiators or similarly durable objects.

Using a Paint Stripper

If the paint proves to be quite stubborn, you could elect to utilise a chemical paint stripper. Make certain that the solution in question will not harm the underlying brick in order to preserve the brickwork. It is also wise to employ these tools during the process:

  • A scrub brush
  • A putty knife
  • Latex gloves

Assuming that the paint has been stripped, wash the brickwork with detergent and warm water in order to remove any solvent that may still remain.

In Conclusion

Painting brick is a great way to give your home an updated look. But, what do you do when it’s time for the paint job to come off? There are many different ways that homeowners can remove paint from their brickwork and not all of them will work as well on some types of bricks like others.

We recommend using our professional stripping services which removes old paint without damaging new ones or any other surfaces in your house! Contact the experts at Premium Door Stripping today if you need more information about how we can help with removing old paints or want to book an appointment for one of our professionals.

Turpentine vs Solvent: Which Chemical Best Dissolves Paint?

Turpentine vs Solvent_ Which Chemical Best Dissolves Paint

Stripping paint off of materials such as wood and metal is an excellent way to restore countless objects to their former glory. From antique furniture to radiators and picture frames, this process is just as much of an art form as a science.Turpentine vs Solvent_ Which Chemical Best Dissolves Paint

The materials used as just as important if you hope to avoid any damage while expediting the process. This brings us to an important question. How does turpentine measure up to solvent if you happen to be addressing a stripping project in the near future?

Let’s compare each of these approaches in order to appreciate the big picture.

When Should Turpentine be Used?

Turpentine is not considered to be a traditional solvent due to the fact that it is not derived from petroleum distillates. While this is somewhat beneficial in terms of toxicity, turpentine is only the best option if you happen to be removing paint that has recently hardened.

It may take many more applications to deal with paint that has been applied in layers or has existed for decades at a time.

A Look at Solvents

Solvents (such as naphtha) are much more powerful solutions in terms of a paint stripper for wood and other substances. However, these are flammable solutions and care needs to be taken during the process.

Furthermore, solvents may damage the underlying material if allowed to remain on the surface for extended periods of time.

Glues and other substances could likewise be adversely affected, so be sure to employ caution.

Each of these chemicals offers its own set of advantages. However, there can still be times when you are uncertain of which one represents the best option.

This is why it is always prudent to contact Premium Door Stripping so that you can make the most informed decision.