Why Paint Stripping Is Necessary

paint stripping

paint stripping

What is the Importance of Paint Stripping?

Every once in a while, you may want to give your home or office space a new look. A crucial part of a renovation is applying fresh paint on walls, probably a different colour. However, applying new paint over old paint could result in issues. This, therefore, means that stripping the original paint is also a crucial aspect of renovation.

The Benefits of Paint Stripping

Stripping paint helps to avoid issues that arise from painting over old paint, like:

  • Chipping
  • Peeling
  • Bubbling

The Technique of Stripping Paint

In most cases, stripping paint involves the use of chemicals. Such chemicals can be harmful when breathed in or when they come into contact with the skin. Using the right technique would help to keep the negative aspects of strip painting minimal.

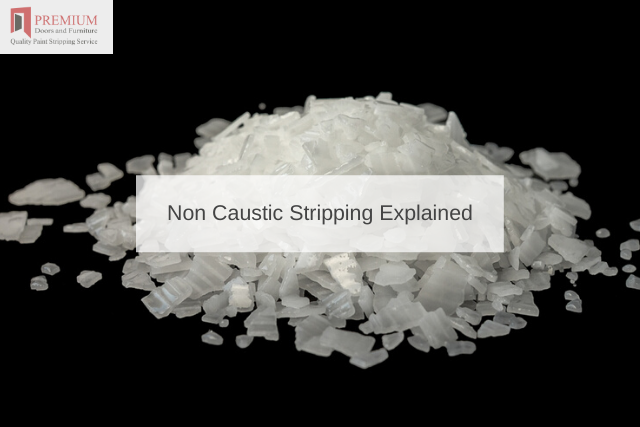
The first step to stripping painting is finding the right paint stripper. Different paint stripping mechanisms have varying strengths and consistencies. Lye-based paint strippers are the strongest in the market. However, for vertical surfaces, gelled strippers would work best, while for items like furniture, the pourable ones would be ideal. Getting professional help would be the wise thing to do when trying to find the best stripper for your purposes.

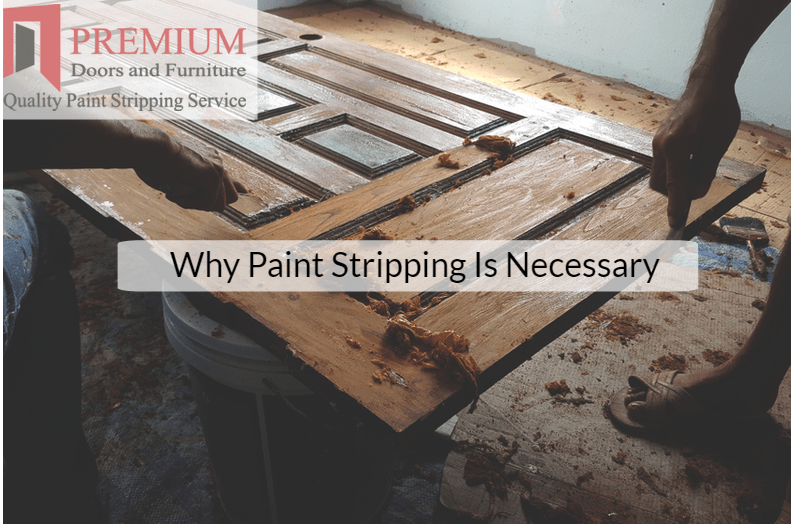
Once you have your appropriate stripping chemical, the next step would be to apply the stripper on the walls and other surfaces. As you continue to use the compound, you should start to see the paint bubbling. This is a clear indication that the paint stripper is efficient. Leave the surface unbothered for at least ten minutes before proceeding to the next step.

Once the ten minutes or so have elapsed, you can now proceed to scrape off the paint. A paint scraper or a putty knife would do the trick. In case there is some stubborn paint left on your surface, you can apply a fresh coat of the paint stripper then scrape it off.

Hire the Professionals

While you can strip paint from surfaces on your own, the task is not one to look forward to, and most of the time, it is more complicated than it seems. It is, therefore, wise to hire a professional firm or individual to do the work. Hiring a professional, like Premium Door Stripping, would also help you save time and in some cases, money. Premium Door Stripping offers a range of paint stripping services for furniture and doors, among other surfaces and materials at affordable costs.

Non Caustic Stripping Explained

Non Caustic Stripping Explained

Non Caustic Stripping ExplainedWhen thinking of removing paint from a surface, you could be tempted to sandblast, wire brush or caustic solutions. These methods would work on certain surfaces, but they could seriously damage wood and leave it exposed to the elements. Because wood stripping is delicate, it requires a lot of knowledge.

Wood Stripping

Some woods strip better than others. For instance, interior doors have some parts that could be veneer while the rest of the components may be solid wood. In such cases, the stripping must be done in a way that the door will not fall apart. Depending on the number of layers the furniture has, a repeat stripping process may be required.

At Premium Door Stripping, we professionally strip internal and external doors, tables, beds and tables, among others.

Although veneer and plywood stripping is not recommended because they have a low thickness, we can still strip the paint out.

Notice that this will require an extra keen eye to ensure that damage is not caused. We have non-caustic elements that strip wood gently without causing damage to it.

What is Non-Caustic Stripping Best For

With our expertise, we are careful to use the right stripping method on each type of wood. Non-caustic is best used on woods such as oak. Oak is light coloured and can turn into a dull grey when stripped with caustic soda.

Non-caustic does not have toxic residue, meaning it does not leave the surface damaged after paint removal.

For beech wood, non-caustic stripping is the best method. It is a dry hardwood that does not tolerate dampness. Dampness puts it at risk of warping. Walnut is the other wood that will require non-caustic removal. This is because it tends to discolour quickly and crack when stripped with caustic soda.

Why a Professional is Needed

Professionals are trained and have experience with wood stripping techniques, meaning they can complete the job quickly and thoroughly. They are also aware of what chemical elements work and which ones don’t.

Also, chemicals used in wood stripping are hazardous and must be used as directed. They can harm the skin, lungs and eyes and produce toxic fumes.

They also must be cleaned off properly before new paint occurs. Our expert strippers handle each project with expertise.

The cost of the job depends on the type and amount of paint to be removed, the quality of the surface and whether refurbishing will be needed.

While there are many guidelines on how to strip furniture, if yours is of high-quality or is an antique, trust the job to a professional.

Why Stripping Is Better Than Sanding

Why Stripping Is Better Than Sanding
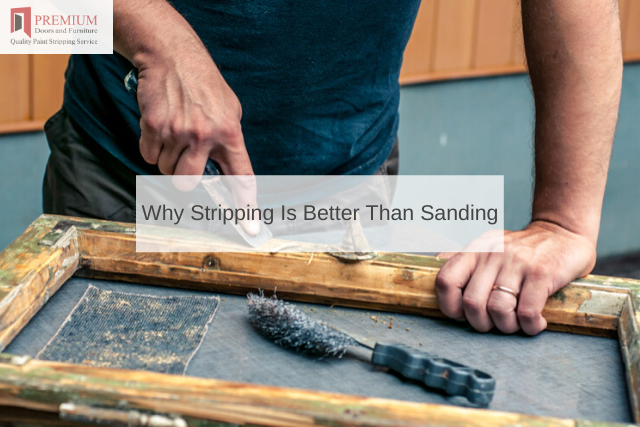
It can seem that sanding is a cleaner, quicker method of paint removal but there are pros and cons to both methods, and when they are all weighed against each other it can clearly be seen that stripping is actually the more efficient method. Let us take a look at both processes:

Issues with Sanding

Sanding is an invasive method of paint removal, and it can scratch and damage the wood, especially thin veneers. Quite apart from that, it is a very hands-on, lengthy matter, and it can get very tiring as you need to go over the surface many times in order to remove every trace of paint and varnish.

It can be very slightly easier with very old, flaking paint and varnish, but even then there tend to be tough little patches that need intensive work that can leave your surface looking uneven.

Even using power tools to sand can be a lengthy process, and you will find sanding dust everywhere in the room for days afterward.

Stripping Benefits

The best thing about using a paint stripper is the fact that it relies on chemical action and time to work. You must leave the stripper on the paint or varnish for at least as long as the instruction allow.

Apply the stripper and leave it to do its work as you get on with other tasks – such as taking the doors off their hinges ready to be done next if door stripping is on the agenda, or making sure that you have enough of the new paint or varnish to go on as soon as the surface is ready for its new coating. Once you come back to see how it is getting on, you can simply wipe off the by-now soft and loosened paint.

Lead Warning

Speaking of door stripping – or any other wooden item that might have very old paint on it – there is one last reason to choose stripping over sanding. If the paint is older than forty or fifty years, it may well contain lead.

This can become problematic if sanded, as tiny flecks of lead-infused paint could be breathed in, causing illness. With a stripper, the lead remains bound into the paint, and is harmlessly wiped up and disposed of.

If you are still not sure about how to proceed: save yourself the time and stress, and give us a call. We offer a great range of expert services and we can set you right in no time.

5 Wood Finishing Mistakes to Avoid

5 Wood Finishing Mistakes to Avoid

5 Wood Finishing Mistakes to AvoidWhile finishing wood and wood products may sound relatively easy but is more often than not a tasking activity especially for beginners. Making any mistakes can be outright annoying and costly too and sometimes it can pose serious health concerns.

Mistakes in DIY wood projects are common thus it is important that you understand some of the few mistakes that you can avoid when finishing wood and its products. Here are some mistakes to avoid.

1 Choosing to manufacturer instructions

While you might have done some similar projects before and you basically know what to do, it is important to read the manufacturer’s instructions before going ahead to finish your project.

The manufacturer includes these instructions to help you know what products to use based on the chemicals and ingredients they used during production.

2 Not thoroughly furniture stripping

If our DIY project requires a bit of stripping, go ahead and do thorough furniture stripping. It is not uncommon to find homeowners stripping the old paint and then just partially finishing it.

This often leads to faded spots and botches. Make use of sandpaper or sander and ensure you sand it down to the bare wood first before anything else while watching out for any spots.

3 Not properly sanding your wood

Sanding is an important first step in preparing your wood for finishing. Analyse the type of wood you have to help you choose the grit of sandpaper you need for that project.

Coarse sandpaper on softwood is not advisable and so is using smooth sandpaper on coarse wood. Have the right sandpaper for your wood and sand your wood a minimum of two times while removing grit in between the sanding as you build up.

4 Failing to rub out

Not rubbing out your wood can possibly lead to a series of errors, unevenness and defects that with every coast of applied only leads to thick and bumpy coat that feels and looks ‘plasticky’.

Just learn to apply a few extra coats to your wood and sand it out with the right grit of sandpaper to enable you to remove any dust or irregularities. Finish the rubbing by a fine grit sandpaper the entire piece leaving a pleasantly done project.

5 Using incompatible products

If you don’t understand the type of products suitable for you project, it is necessary that you seek professional advice before you make some expensive mistakes.

For instance, dealing with oily tropical hardwoods can be quite challenging because of the antioxidants contained in the wood thus find a product that has a similar base solvent. Failing to do so will make your wood appear tacky and wet.