


Weatherstripping is one of the most important components of any door. This flexible seal provides a barrier against temperature variations, moisture, drafts, and even some insects.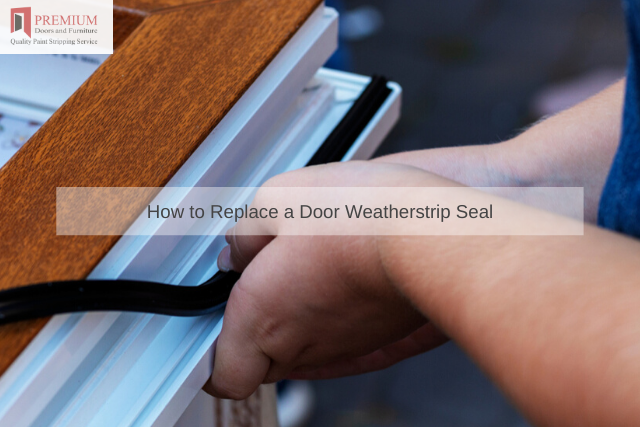
While quite durable, there are times this weatherstripping needs to be replaced due to wear and tear. Let us look at how such a seal can be quickly replaced.
Removing the Old Weatherstripping
The most common type of weatherstripping is a rubber material that takes on the form of a flange-style bulb.
First, grip the weatherstripping with your fingers (preferably at an end or a corner).
Gently pull the flange away from the groove that is found on the door jamb. Repeat this process for the vertical and horizontal sections.
Clearing Away Any Existing Remnants
While most weatherstripping can be easily removed, some types may have been affixed in place with the use of a caulking agent or tack nails.
Take a look in order to determine whether these are present. If so, cut away the caulk with a utility knife or remove the mails with a pair of pliers.
Installing the New Seal
Measure the length of the upper horizontal door jamb and cut the new weatherstripping accordingly.
Press the flange end into the existing groove until it is flush with the jamb. Repeat this process when dealing with the two vertical sides of the door. Using a utility knife, cut off any excess weatherstripping that may remain.
So, we can see that replacing weatherstripping is a relatively simple task. There are nonetheless times when more complicated projects may need to be carried out.
In such instances, it is best to contact the team at Premium Door Stripping. We will be more than happy to answer any questions that you may have before tackling a future project.