How To Strip Paint Off Stone Window Sills

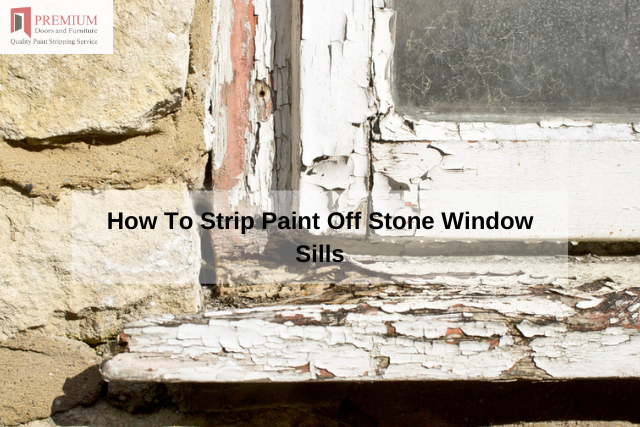
Painting stone window sills not only adds aesthetic value but it also prevents rain ingress in porous stone.How To Strip Paint Off Stone Window Sills

Over the years, there may be an accumulation of several thick layers of paint on the stone window sills that may be an arduous task to remove.

Traditionally, there have been unsafe and inefficient methods to painstakingly remove this paint through the use of solvents, heat treatment or mechanical means such as sanding machines (either manual or electrical).

Here is a safe and fully effective method that Premium Door Stripping use to strip paint off stone window sills.

Paint Removal Methods

Manual scrubbing can be tedious, even if you are trying to eliminate emulsion paints.

For oil paints, it is even more laborious if you are using a steam stripping method, which will also take time.

Mechanical methods may cause significant stone damage, increasing the stone’s vulnerability to weather conditions, essentially losing the building’s architectural detail. The fastest, safest, and most effective method is using caustic soda.

Caustic Soda

Caustic soda is a combination of two processes. First, caustic is a general chemical substance that has the capability to dissolve or destroy other substances.

Soda, unlike the fizzy drink we all know, refers to a chemical substance, sometimes referred to as lye.

Caustic soda is a sodium hydroxide chemical presenting as a radiant white solid substance.

It is used to make soap, paper, and candles. It also removes paint. Caustic soda paint removal is ideal for stone, wood, and metals.

Its properties remove the paint layers with minimal effort, making it a solvent-based paint stripping agent.

How to Use Caustic Soda for Paint-Removal

  • Patch testing

You may consider carrying out a patch test to ensure the stone will not be damaged after caustic soda application. Some stone types are not as porous as others.

  • Preparation

You will require eye protection, a pair of gloves and warm water.

  • Application

Mix the solid caustic soda with warm water to create a fluid substance, then apply it to the window sills.

This method ensures even paint that has accumulated in layers over the years is removed.

How To Strip Paint Off Aluminium Bike Frame

There is attractiveness in raw and unfinished material that’s regularly hidden with unnecessary layers of paint.

Most people would prefer everything to be true to the material’s nature. Your aluminium bike frame is probably painted, and you are wondering how the material looks from a given point of view.

Well, worry no more because you will learn more about the process of stripping paint from metal by the end of this article. So, read on.

Most bikes are made of aluminium which is typically a lightweight and corrosion-free alloy.

Still, you may find out that the frame corrodes from time to time. However, the corrosion process may form an aluminium oxide that protects that material against further corrosion.

Top Things You Need to Consider

The essential thing you need to note is that you will void any existing warranty if you decide to remove paint from your bike. Also, the process is irreversible, and you may damage the bike to a great extent.

Moreover, some of the used chemicals are highly dangerous. You, therefore, have to undertake all the essential safety precautions.

Steps to Follow

First, look for the perfect paint removal chemical. Afterwards, apply it to the bike’s frame. It’s worth noting that most of these chemicals evaporate quickly.

So, you can wrap it in a plastic bag. This way, the painted frame will stay wet for an extended period, and in the process, you will decrease the amount of required chemical solution.

It would be helpful to consider buying a Premium Door Stripping chemical solution.

After roughly fifteen minutes, you can unwrap the bike frame to determine whether the paint is peeling off. In most cases, you will see the pain falling off the bike’s frame.

After removing paint from most parts, you may end up with a few parts that will remain stuck on the frame.

Most manufacturers use some type of filler to smoothen the joints. In this case, you can use sandpaper to eliminate the filler.

You can use different types of brushes and sanding papers to attain different types of aluminium finishes. In fact, it’s possible to polish the frame to acquire an extremely shiny look.

How to Strip Paint From Plaster Walls

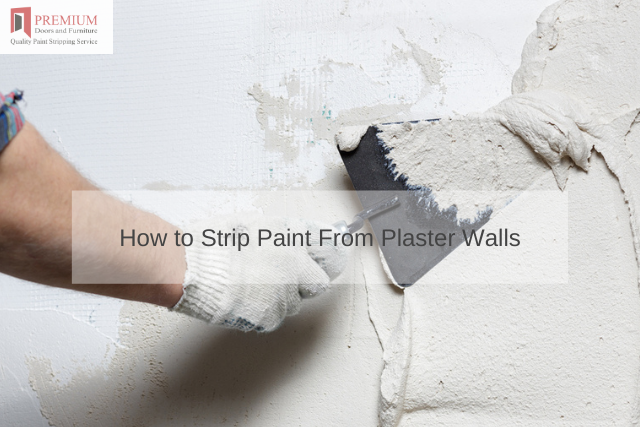
Painting plaster walls is a common way of adding colour and creativity to their designs.How to Strip Paint From Plaster Walls

There are plenty of ways to decorate a plaster wall, ranging from wallpapers to painting afresh to change the colour or renovate.

However, you must clean the plaster walls before you can refurbish or repaint them.

Like furniture stripping, removing old paint from your plaster walls is necessary to ensure the best results from repainting and other decorating work.

Stripping paint from a plaster wall can be relatively challenging as it has a porous surface. However, the process can be easier if you find the right method.

Methods of Stripping Paint from a Plaster Wall

Here are some of the methods of stripping paint from a plaster wall;

  • Paint Stripping Using Chemicals – Chemical stripping, often used with the experts at Premium Door Stripping, is one of the best methods of stripping paint from a plaster wall if the paint has not chipped or loosened on its own.

    You should be careful when applying these chemical strippers as they contain strong chemicals that may damage the surface if improperly used.

    Use a paintbrush to apply the stripper directly onto the surface and let it sit for as long as the manufacturer has instructed. The stripper will loosen the paint, making it easier to scrape using a putty knife or sandpaper.

  • Scraping – Scraping is the cheapest and easiest way to strip paint from a plaster wall. If the paint has loosened or started peeling off, you can use a scraper blade or a putty knife to remove the pieces.

    You can use sandpaper fitted with a rotary tool to strip the paint from small and unreachable surfaces. You should be careful when scraping to avoid gouging the wall.

    Additionally, you need to clean up the area once you are done stripping paint. To make cleaning easier, you can lay down a piece of material under your working spaces.

Provided you find the best method, stripping paint from a plaster wall should not be challenging.

The above methods will make it easier to strip paint whenever you need to repaint a plaster wall.

If you used a chemical stripper, ensure you use a neutralizer afterwards to prevent the chemicals from seeping and staining the wall.

Tips on How to Prevent Damp and Mould on Wooden Interior

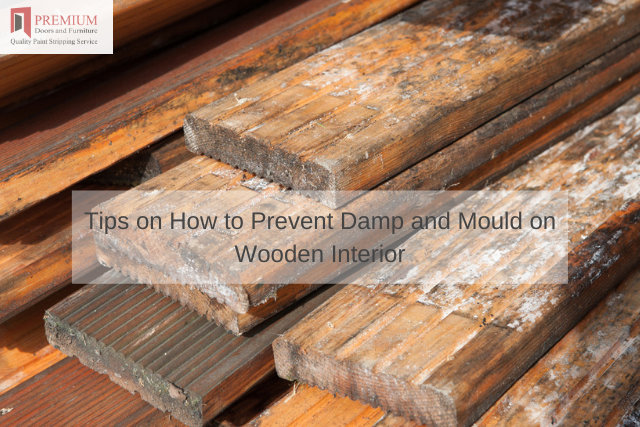
Are you looking for ways to keep your wooden furniture secure? Well, failure to maintain the wooden interior makes them wear off over time.Tips on How to Prevent Damp and Mould on Wooden Interior

Mould, grime and dirt may accumulate and become hard to eliminate over the long run.

It would be unbearable to see your valuable wooden interior get destroyed in this manner, wouldn’t it? Now, how do you prevent damp and mould on your furniture? Keep on reading to find out!

Ensure Everything is Clean

Ensure the closets, basements, dresser drawers and any location where mould is likely to grow is as clean as possible.

Dirt particles offer a perfect habitat for mould to start growing provided the temperature and moisture are appropriate.

The greasy films like those on kitchen walls, on the other hand, comes with nutrients that facilitate mildew formation.

Now, to ensure your property is totally free of damp and mould, it is advisable to hire the services of Premium Door Stripping for specialised top-rated stripping and finishing services on various wooden items.

Eliminate Dampness

Since mould spores are readily available in the air, they may settle on your furniture if there is adequate moisture. A damp structure is typically due to moisture that condenses due to humid air that cools on the surfaces.

Most basements are always wet from the water that leaks via wall crevices. In this case, ensure the outside drainage is working appropriately. Should you require to perform some repairs on the walls, please use the right Paint Removal Tools, and then apply a coat of cement to prevent water leakage.

Improve the House’s Air Flow

As the room temperature drops, little moisture will remain in the room. Keep in mind that without a perfect airflow in your house, the excess moisture may stick onto the floors, windows and walls.

Therefore, you can improve the circulation by opening doors between rooms, open doors to the closets and move the furniture away from the walls. Also, allow fresh air to get into the room to prevent mould formation and lower moisture.

Prevent Overstuffing

Lastly, avoid overstuffing the kitchen cupboards and wardrobes. An overstuffed cabinet offers a perfect mould breeding ground as it lowers free air circulation.

How To Remove Water Stains From Wooden Furniture

Thinking of how to replace your coffee table as a result of water stains isn’t advisable. This post will enlighten you on the expert tips to help you remove the water rings with daily household products.How To Remove Water Stains From Wooden Furniture

Here is how;

Spread Some Mayonnaise

Are you surprised that mayonnaise is of help in such a situation? You probably have plenty of it in your fridge. Dab mayonnaise onto the stain using a paper towel. Allow it to sit either overnight or for a few hours. The paper towel should remain on top all this time. The following morning, using a clean cloth, wipe away the mayo. Finalize this by polishing it with vinegar.

Combine Olive Oil and Vinegar

Using a small bowl, mix equal proportions of olive oil and vinegar. Using a piece of cloth, apply the mixture to the stain. Continue wiping towards the wood grain until you are sure that the stain is erased. The olive oil, in this case, is furniture polish, while vinegar will clear the stain. You can use the sum up by wiping the area clean. Ensure you are using a dry, clean cloth.

Use an Iron

Lay a clean cloth on the water stain. Preferably, a cotton cloth without prints. This is advisable to avoid the transfer of any patterns. Ensure the iron is preheated to a low temperature. Set the iron on the cloth briefly over the water stain. In case the stain is not wiped out at the first attempt, repeat the same process until the stain is cleared. It is important to note that this method is ideal for damp stains.

Plug in A Hairdryer

The method requires you to plug in the dryer and ensure it is turned to its highest setting. Ensure the hairdryer is focused on the stain. In this position, maintain your grip until the stain disappears. Unplug the dryer and polish your table using furniture oil. Cleaning wood after paint stripping is highly recommended to maintain its quality. Olive oil can also be of help in this case. The method is suitable for freshwater stains.

How To Repair a Door Frame with Wood Filler

Dents, holes, and cracks in door frames affect the look of the frame. Also, they can harbor insects and moisture, which is something you may not want to experience.How To Repair a Door Frame with Wood Filler

The bigger issue, however, is serious damages to the wood, such as extensive rot. When the damage is too visible, you may need the services of professionals like Premium Door Stripping. Depending on the magnitude of the damages, you can not easily patch over the areas.

However, cosmetic imperfections are easy to deal with. There are several wood fillers that you can use to sort the mess. Most important is using epoxy for significant repairs.

Also, using a filler that matches the stain or the one that fits the colour of your door frame is a plus. Follow these steps;

1. Scrape

Take your time and scrape out any flaking and splinters of paint from the damaged parts using a wire brush. In case of any stubborn scraps or lumps, the corner of a knife blade will help you. Don’t forget to seek the help of Vacuum’s brush attachment to vacuum the frame to remove any remaining dust.

2. Mixing the Filler

It is important to soften or mix the filler as per instructions. It could involve stirring to the point of hardening, kneading until it softens, or mixing different substances until you get a similar colour. Preferably, mix small amounts of stain to a point where the filler and the frame match.

3. Applying

At this point, apply the ready filler on a putty knife. You will then scrape it onto the frame’s damaged area. In case the whole is deep, force filler deeper using the flat side of the blade. This should be followed by scraping the filler smooth using the edge of the blade.

4.Drying

Allow a reasonable time for the filler to dry. If shrinking while drying is noticeable, there is no harm in applying a second coat following the aforementioned steps.

You can slightly overfill the depression. This will ensure it remains filled even if there is shrinking again. Wait for it to dry after the second coat.

How To Paint a Marble Fireplace

A marble fireplace surround is known to add a touch of beauty to your house, giving it a unique visual appeal.How To Paint a Marble Fireplace

However, choosing a marble fireplace surround comes with a major drawback; when damaged with age, it is quite expensive to replace. An alternative to replacing a marble fireplace is painting.

Although you will lose the marble natural stone touch, you will achieve a new look of your choice that rhymes with your house décor. So then, how should you go about painting your expensive marble fireplace? Read on to find the tips you can use.

Step by Step Guide on Painting Your Marble Fireplace Surround:

First, clean the marble surface to remove dirt, dust, grease and other contaminants. You may use mineral spirits or any other effective solvent-based cleaner.

Check for any cracks within the surface and refill them as they are likely to affect the uniformity of your painting. An epoxy filler works well in covering the cracks.

Use a 220-grit sandpaper for sanding the glossy marble surface to roughen it. Roughening the surface makes it more accepting primer and paint. Be sure to roughen all the surfaces you need to paint and wipe them with a tack cloth to remove any residual sand dust.

Lay protective clothing around and under the fireplace to protect the surrounding from paint. Additionally, cover the surrounding walls with painters’ tape.

Now cover the marble surface with a three in one primer suitable for glossy surfaces. The primer contains a primer, sealer, and an undercoat. Leave it to dry before adding a second layer for proper coverage.

Inspect the primer for dryness and when it completely dries up, sand the surface again using a 220-grit sandpaper to prepare it for the paint. Again, wipe it using a tack cloth to remove residual dust.

Now paint the surface using your preferred gloss paint. Use a brush or a roller to apply the paint, thinning it as per the instructions on the label. Let the first coat dry before applying a second one, sanding in between the coat layers to achieve the desired uniformity.

Continue applying thin layers of paint until you are satisfied with the results. Sand the coats and ensure they are dry before applying another coat for better bonds and long-lasting paint. After applying the last layer, leave it to dry for at least 24 hours before igniting the fireplace. Ensure that you use heat resistant paint.

If your end paint is not as pleasing as you expected, you may consider removing the paint. You can hire professional removal services from fireplace paint removal. They will help restore your fireplace to its former state.

Conclusion

Adopt the above steps and give your marble fireplace surround a new look. However, if you feel that you cannot do the painting yourself, you can always request professional help from Premium Door Stripping. These are experts with years of experience in painting and paint removal services on marble fireplaces.

How To Paint Wooden Window Frames Inside

How To Paint Wooden Window Frames Inside

Furniture looks great when it’s freshly painted. But, most people don’t think about painting the inside of their window frames. This is a mistake! When you paint the inside of your window frames, they will look new and fresh for years to come.
How To Paint Wooden Window Frames Inside

Stripping off the Wooden Windows

Before the process of painting your wooden window frames, you need to remove the old paint and caulk. If you don’t strip off all of the old materials, your new coat will peel right off after a few weeks or months.

There are many methods for paint stripping. The easiest is to use a heat gun that works on low heat. This will melt the paint and then you can scrape it away with a putty knife. If you are not comfortable with this process, there are many paint stripping specialists such as Premium Door Stripping who will do the work for you at the highest quality.

Clean and Prepare

Once you have stripped all of the paint away, it is time to clean and prepare your window frames for painting. You can use a powerful cleaner or mineral spirits mixed with water in a spray bottle to get rid of any residue leftover from the stripping process.

After this, sand down each individual frame thoroughly so no rough spots remain on them as this would cause the paint to chip later on down the line. The sanding process doesn’t need to be too fine, just enough to get a smooth surface.

Other preparation methods may include filling any holes or cracks in the wood with filler to prevent an uneven finish.

Determine Which Type of Paint To Use

There are many types of paint to choose from when painting a wooden window frame available in a range of finishes, colours and effects.

Today, professional painters are using a wide range of paints for various purposes. Some are best suited to interior jobs while others are more durable and made for external surfaces.

The type you choose will depend on your requirements as well as the quality of paint desired by how much effort is needed in its application etc.

Painting the First Coat

Before any painting, apply masking tape around the edges window frame to prevent paint from seeping onto the glass.

Once you have determined the colour of paint to be used, apply with a small brush to get into the corners of panes, along with around any hardware and achieve a smooth, even finish.

Stroke the brush in a horizontal direction, following the direction of the grain of the wood.

After allowing sufficient time for it to dry, remove the tape and apply a second coat of paint. This should be applied in vertical strokes following the grain again.

Once the first coat of paint has dried, simply repeat the process with a second coat.

In Conclusion

If you’re looking for the best way to paint wooden window frames on the inside, we hope this blog post has helped. Our first suggestion is always to strip down any old existing paint so that your new coat of paint stands out and lasts longer!

We recommend Premium Door Stripping because they offer high-quality service at an affordable price. Call them today if you need help stripping a door or painting windows in your home!

How to Repair a Dent in a Wooden Door

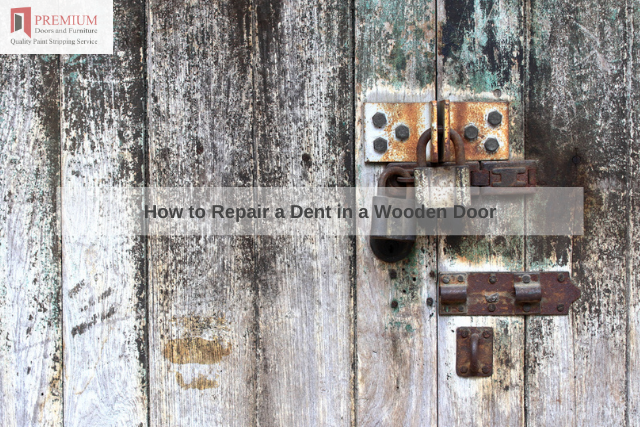
Having a broken or damaged door increases the insecurity levels in your premise. A homeowner must ensure that the doors are repaired and the functionality reinstated.How to Repair a Dent in a Wooden Door

If you are reading this, there are chances that your wooden door has a dent. Worry no more! The information discussed here aims to educate you on the most viable ways to repair a dent in your wooden door.

Choose Wood Filler

A homeowner must find the right wood filler for the task. The suitable material should match the wooden door and give you that naturally perfect finish.

Depending on the extent of the dent, one can purchase the vinyl sparkling compound, solvent-based wood filler or epoxy wood filler.

One can use Vinyl for light woodwork repair and epoxy wood filler for the extensive dents. Companies like Premium Door Stripping offer comprehensive coverage on the ideal wood fillers to choose.

Fill in and Smooth the Filler

It would be best if you began by mixing the wood fillers with water or suitable hardeners. Once ready, you can apply the substance onto dry wood.

Applying on wet wood exposes the filling to moisture hence altering the quality; it is more susceptible to failure.

For the large dents, one should use a putty knife while the smaller ones require your finger. Stainable fillers are indispensable if one intends to stain the wooden door after that.

Let Dry and Sand the Area

Depending on the dented area, one can use fine sandpaper of the 120-grit paper. The sanding process ensures that there’s no residue after drying. Using epoxy fillers requires that you use a file.

You should sand by hand so that no depression forms on the filled area; the uniformity should be your focus point.

When sanding, one should do so in the same direction as the wood’s grain so that you avoid getting scratches on the finished product. A homeowner can choose to clean wood after paint stripping for perfect results.

Conclusion

Wood filler is a versatile substance used to repair scratches, chips and dents on wooden items. It works efficiently in restoring the elegance and functionality of the door.

How to Identify the Early Signs of Damaged Paint

What expectation do you have when hiring a professional painter for your home or piece of art? To get elegant and long-lasting results. However, that’s not what we always get.

Why? Well, there are tons of less skilled and dishonest painters out there who fail to follow the ideal steps. In turn, they tend to leave you with streaky and smudged paints.

Some start fading or crack with no time, and you end up spending more to repair the paints. Identifying the early signs of damaged paints can help you cut-the re-painting costs. That’s why this article comes in.

A streaky, blistered or blotchy paint

These flaws on your paint show that the coat got applied on a dirty or wet surface. Over time, the painted surfaces pick up dust and grime, and it affects the paint’s adhesion causing paint failure.

Also, it may tell you that the cover was not cleaned well through soda blasting. This makes the paint not to adhere uniformly, causing it to blotch and streak. Moreover, the moisture can make it to start blistering and even peel off easily.

It starts smudging, wrinkling and cracking.

In case you notice such problems, it may be that the second paint came before the first one drying. Thus they make the coat to start smudging and form crack lines across.

Usually, the drying period of a coat will depend on the levels of moisture on the surface and the type of paint used. A coating can wrinkle if the oil-based paint that was colder than the room’s temperature.

Besides, the painter might have used a varnish remover for wood pieces causing smudging.

Chalking paint

Chalking occurs when the coating starts to break down. Here, you will spot the paint, developing a white, powdery film and the colour may start fading. You can wipe the stain off with a light brush.

Long-term exposure of the paint to sunlight could lead to this damage. Moreover, the paint used could be thin, or the surface was not well cleaned before the painting.

Bring in a professional

Sometimes we may get blinded with the changes that our pieces of paintings undergo. We tend to ignore that everything is fine until it is too late and quite costly to revamp the paints.

Hiring a professional to inspect and track your pieces of paintings can be a great deal. They have skills and expertise for easy identification of possible paint damages.

So, they tell you on how best the damage can get handled before turning into something terrible.

Prevention is better than cure! Identifying damage to elegant paint as early as possible can be quite beneficial.

It helps you plan for re-painting. More importantly, it reduces the overall cost of making things right with your paints.

We hope you have learnt the simple tricks that will help you identify the early signs of damaged paint.