What is the Proper Way to Weather Seal a Door?

What is the Proper Way to Weather Seal a Door

Modern doors are designed to withstand the elements, to conserve energy and to provide a unique aesthetic appeal to your property. However, their periphery can often allow cold air to enter and warm air to escape.

What is the Proper Way to Weather Seal a DoorThis is why a principle known as weather sealing (sometimes referred to as weatherstripping) is crucial.

What is the proper way to install these seals so that you can remain warm and comfortable during the colder months of the year?

Removing the Old Material

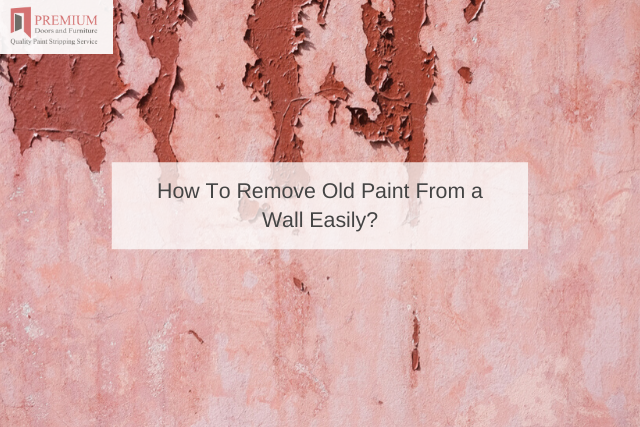
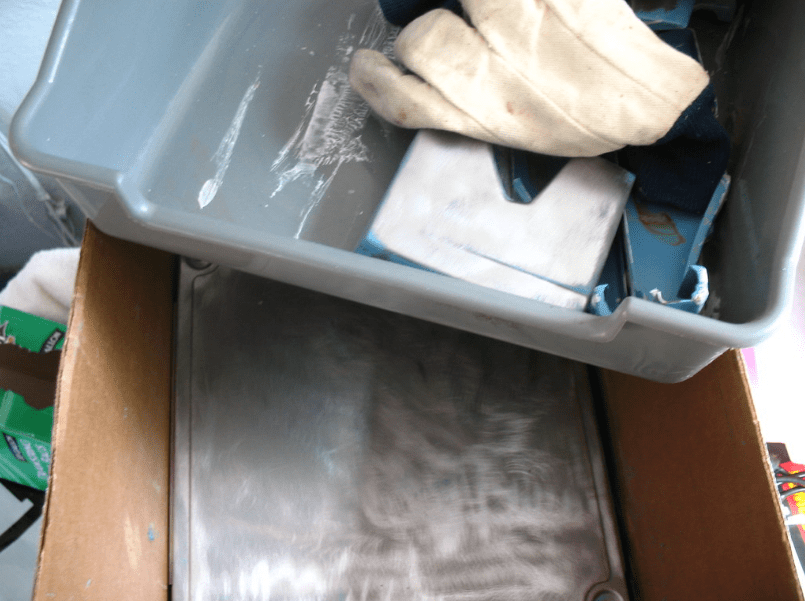
If the door has not been modified in the past, the chances are high that existing weatherstripping is present. This should be removed with the help of a handheld razor blade.

Any tacks (known as brad nails) must also be pulled out with a pair of pliers. Once the old stripping has been removed, wipe the area with a damp cloth to clean off any residue.

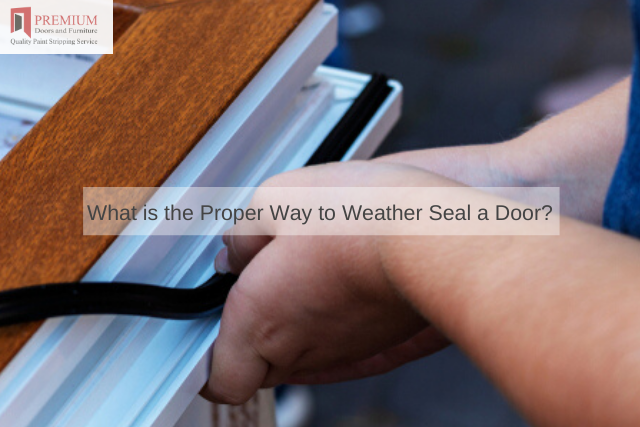
Installing the New Weatherstripping

Beginning at the base of the door frame, begin pressing in the weatherstripping. When you arrive at the top corner, cut off any excess and continue the process around the horizontal section and down the other side.

It is important to note that the majority of weatherstripping designs are meant to fit snugly in the cracks, so be sure to push the strips in until they are flush with the surface.

You may also wish to install a door shoe (a protective piece of stripping that prevents cold air from entering along the base). In this case, you may have to remove the door so that the apparatus can be correctly fitted.

However, this will depend upon the amount of clearance between the door and the floor.

To obtain even more advice or if you wish to restore an old door to its former glory, please contact Premium Door Stripping in order to speak with a technician.

Is Caustic Soda The Same As Lye?

caustic soda

Caustic soda and lye are common names for sodium hydroxide. The term caustic soda comes from the chemical name and because it is a corrosive substance. Pure caustic soda, or lye, is a white and waxy solid. It will quickly absorb any water to form aqueous solutions. The commercial form of this substance is different from the pure gorm in that it is usually already mixed with water to form sodium hydroxide monohydrate.

How to get Lye / Caustic Soda

Previously, obtaining lye was relatively easy. There was a product which no longer exists called Red Devil Lye that was widely available. Since lye is used to control the pH when producing methamphetamine production, it is much more closely monitored than it used to be. However, it is still possible to obtain the chemical. When doing so, buyers should ensure that why they are buying is pure sodium hydroxide/lye/caustic soda. This is important when using caustic soda for paint stripping as an impure product may not have the desired effect.

Bear in mind that purchasers of lye or caustic soda may have to sign a declaration that states the substance will not be used for illegal activities. However, this is not always the case since paying by credit card allows the authorities to find you if they suspect you are not using your caustic soda for paint stripping and are in fact, starting a local drug trade.

Useful Tips

Buying caustic soda or lye is relatively difficult so it is better to buy in bulk. To make the cost more bearable, consider finding others who also need to purchase it and then split the cost. It is not terribly expensive but it unlikely that you will need several kilograms of it. Remember that caustic soda reacts very quickly with water so keep the container sealed and stored in a dry space. Also, make sure it is stored out of reach of children or animals since lye or caustic soda can cause severe chemical burns. Use gloves when handling lye and make sure that any work you perform with it is carried out in a well-ventilated environment.

Possible Substitutes

Sometimes, you can substitute potassium hydroxide for caustic soda. You can even make some yourself by soaking a large amount of ash in a small volume of water. After about a week, the water will have extracted the lye from the ashes. The liquid can be drained and boiled to increase potassium hydroxide concentration.

Eco-Friendly Paints to Consider For Your Wooden Furniture

Eco-Friendly Paints to Consider For Your Wooden Furniture

Painting your existing furniture can be an excellent way to provide a bit of visual style and to emphasise its unique personality. However, one of the main issues with any painting project involves potential environmental concerns.

Many formulations contain specific chemicals that can cause a considerable amount of damage if they are exposed to the water supply or even when left to air dry.

This is when the benefits of eco-friendly substitutes may be worth a closer look.

Let’s examine the principle behind ecologically friendly paints before taking a look at some top brands.

What are Eco-Friendly Paints?

Also known as natural paints, these formulations are associated with extremely low VOC (volatile organic compound) levels. Volatile organic compounds are substances that will break down within a relatively short period of time; releasing potentially hazardous substances into the environment. This is why some paints have an extremely pungent odour.

Eco-friendly variants contain little to no VOCs. Not only are thy safer to work with from a health perspective, but some such as milk-based varieties have little to no smell when being applied.

This is great if you happen to be working indoors. The professionals at Premium Door Stripping will often utilise ecologically friendly stripping agents due to the simple fact that they will not adversely impact the environment. So, what are some of the options at your disposal?

A Quick Look at Some Top Brands

There are a host of options at your disposal and naturally, the exact type of paint will be based upon the intended style of the furniture.

However, a handful of brands provide some interesting alternatives. These include:

  • Auro
  • Biofa
  • earthBorn
  • Ecos
  • Algaia

Some of these firms will offer low-VOC paint formulations while others have done away with volatile organic compounds entirely. The best way to learn more is to navigate to the official website in question and to take a look at their product lists. Not only are eco-friendly paints easy to work with, but they can spruce up a piece of furniture in no time at all.

Why Paint Stripping Is Necessary

paint stripping

paint stripping

What is the Importance of Paint Stripping?

Every once in a while, you may want to give your home or office space a new look. A crucial part of a renovation is applying fresh paint on walls, probably a different colour. However, applying new paint over old paint could result in issues. This, therefore, means that stripping the original paint is also a crucial aspect of renovation.

The Benefits of Paint Stripping

Stripping paint helps to avoid issues that arise from painting over old paint, like:

  • Chipping
  • Peeling
  • Bubbling

The Technique of Stripping Paint

In most cases, stripping paint involves the use of chemicals. Such chemicals can be harmful when breathed in or when they come into contact with the skin. Using the right technique would help to keep the negative aspects of strip painting minimal.

The first step to stripping painting is finding the right paint stripper. Different paint stripping mechanisms have varying strengths and consistencies. Lye-based paint strippers are the strongest in the market. However, for vertical surfaces, gelled strippers would work best, while for items like furniture, the pourable ones would be ideal. Getting professional help would be the wise thing to do when trying to find the best stripper for your purposes.

Once you have your appropriate stripping chemical, the next step would be to apply the stripper on the walls and other surfaces. As you continue to use the compound, you should start to see the paint bubbling. This is a clear indication that the paint stripper is efficient. Leave the surface unbothered for at least ten minutes before proceeding to the next step.

Once the ten minutes or so have elapsed, you can now proceed to scrape off the paint. A paint scraper or a putty knife would do the trick. In case there is some stubborn paint left on your surface, you can apply a fresh coat of the paint stripper then scrape it off.

Hire the Professionals

While you can strip paint from surfaces on your own, the task is not one to look forward to, and most of the time, it is more complicated than it seems. It is, therefore, wise to hire a professional firm or individual to do the work. Hiring a professional, like Premium Door Stripping, would also help you save time and in some cases, money. Premium Door Stripping offers a range of paint stripping services for furniture and doors, among other surfaces and materials at affordable costs.

Non Caustic Stripping Explained

Non Caustic Stripping Explained

Non Caustic Stripping ExplainedWhen thinking of removing paint from a surface, you could be tempted to sandblast, wire brush or caustic solutions. These methods would work on certain surfaces, but they could seriously damage wood and leave it exposed to the elements. Because wood stripping is delicate, it requires a lot of knowledge.

Wood Stripping

Some woods strip better than others. For instance, interior doors have some parts that could be veneer while the rest of the components may be solid wood. In such cases, the stripping must be done in a way that the door will not fall apart. Depending on the number of layers the furniture has, a repeat stripping process may be required.

At Premium Door Stripping, we professionally strip internal and external doors, tables, beds and tables, among others.

Although veneer and plywood stripping is not recommended because they have a low thickness, we can still strip the paint out.

Notice that this will require an extra keen eye to ensure that damage is not caused. We have non-caustic elements that strip wood gently without causing damage to it.

What is Non-Caustic Stripping Best For

With our expertise, we are careful to use the right stripping method on each type of wood. Non-caustic is best used on woods such as oak. Oak is light coloured and can turn into a dull grey when stripped with caustic soda.

Non-caustic does not have toxic residue, meaning it does not leave the surface damaged after paint removal.

For beech wood, non-caustic stripping is the best method. It is a dry hardwood that does not tolerate dampness. Dampness puts it at risk of warping. Walnut is the other wood that will require non-caustic removal. This is because it tends to discolour quickly and crack when stripped with caustic soda.

Why a Professional is Needed

Professionals are trained and have experience with wood stripping techniques, meaning they can complete the job quickly and thoroughly. They are also aware of what chemical elements work and which ones don’t.

Also, chemicals used in wood stripping are hazardous and must be used as directed. They can harm the skin, lungs and eyes and produce toxic fumes.

They also must be cleaned off properly before new paint occurs. Our expert strippers handle each project with expertise.

The cost of the job depends on the type and amount of paint to be removed, the quality of the surface and whether refurbishing will be needed.

While there are many guidelines on how to strip furniture, if yours is of high-quality or is an antique, trust the job to a professional.

Why Stripping Is Better Than Sanding

Why Stripping Is Better Than Sanding
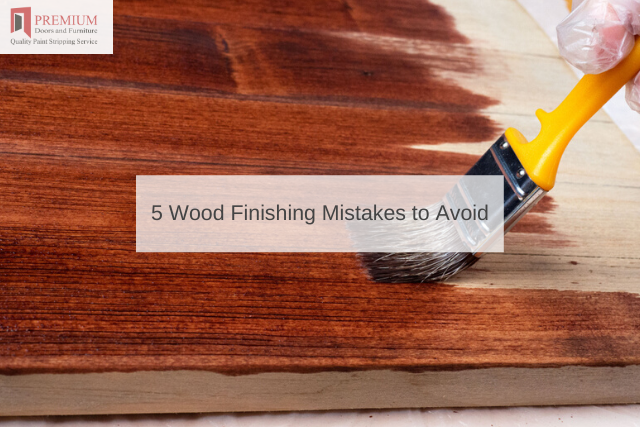
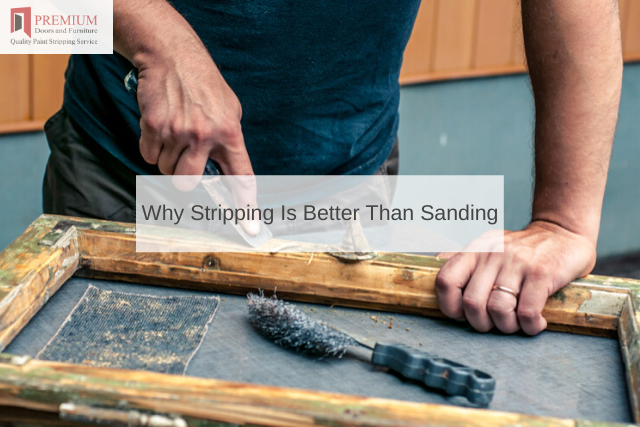
It can seem that sanding is a cleaner, quicker method of paint removal but there are pros and cons to both methods, and when they are all weighed against each other it can clearly be seen that stripping is actually the more efficient method. Let us take a look at both processes:

Issues with Sanding

Sanding is an invasive method of paint removal, and it can scratch and damage the wood, especially thin veneers. Quite apart from that, it is a very hands-on, lengthy matter, and it can get very tiring as you need to go over the surface many times in order to remove every trace of paint and varnish.

It can be very slightly easier with very old, flaking paint and varnish, but even then there tend to be tough little patches that need intensive work that can leave your surface looking uneven.

Even using power tools to sand can be a lengthy process, and you will find sanding dust everywhere in the room for days afterward.

Stripping Benefits

The best thing about using a paint stripper is the fact that it relies on chemical action and time to work. You must leave the stripper on the paint or varnish for at least as long as the instruction allow.

Apply the stripper and leave it to do its work as you get on with other tasks – such as taking the doors off their hinges ready to be done next if door stripping is on the agenda, or making sure that you have enough of the new paint or varnish to go on as soon as the surface is ready for its new coating. Once you come back to see how it is getting on, you can simply wipe off the by-now soft and loosened paint.

Lead Warning

Speaking of door stripping – or any other wooden item that might have very old paint on it – there is one last reason to choose stripping over sanding. If the paint is older than forty or fifty years, it may well contain lead.

This can become problematic if sanded, as tiny flecks of lead-infused paint could be breathed in, causing illness. With a stripper, the lead remains bound into the paint, and is harmlessly wiped up and disposed of.

If you are still not sure about how to proceed: save yourself the time and stress, and give us a call. We offer a great range of expert services and we can set you right in no time.

5 Wood Finishing Mistakes to Avoid

5 Wood Finishing Mistakes to Avoid

5 Wood Finishing Mistakes to AvoidWhile finishing wood and wood products may sound relatively easy but is more often than not a tasking activity especially for beginners. Making any mistakes can be outright annoying and costly too and sometimes it can pose serious health concerns.

Mistakes in DIY wood projects are common thus it is important that you understand some of the few mistakes that you can avoid when finishing wood and its products. Here are some mistakes to avoid.

1 Choosing to manufacturer instructions

While you might have done some similar projects before and you basically know what to do, it is important to read the manufacturer’s instructions before going ahead to finish your project.

The manufacturer includes these instructions to help you know what products to use based on the chemicals and ingredients they used during production.

2 Not thoroughly furniture stripping

If our DIY project requires a bit of stripping, go ahead and do thorough furniture stripping. It is not uncommon to find homeowners stripping the old paint and then just partially finishing it.

This often leads to faded spots and botches. Make use of sandpaper or sander and ensure you sand it down to the bare wood first before anything else while watching out for any spots.

3 Not properly sanding your wood

Sanding is an important first step in preparing your wood for finishing. Analyse the type of wood you have to help you choose the grit of sandpaper you need for that project.

Coarse sandpaper on softwood is not advisable and so is using smooth sandpaper on coarse wood. Have the right sandpaper for your wood and sand your wood a minimum of two times while removing grit in between the sanding as you build up.

4 Failing to rub out

Not rubbing out your wood can possibly lead to a series of errors, unevenness and defects that with every coast of applied only leads to thick and bumpy coat that feels and looks ‘plasticky’.

Just learn to apply a few extra coats to your wood and sand it out with the right grit of sandpaper to enable you to remove any dust or irregularities. Finish the rubbing by a fine grit sandpaper the entire piece leaving a pleasantly done project.

5 Using incompatible products

If you don’t understand the type of products suitable for you project, it is necessary that you seek professional advice before you make some expensive mistakes.

For instance, dealing with oily tropical hardwoods can be quite challenging because of the antioxidants contained in the wood thus find a product that has a similar base solvent. Failing to do so will make your wood appear tacky and wet.

How To Remove Old Paint From a Wall Easily?

How To Remove Old Paint From a Wall Easily_

How To Remove Old Paint From a Wall Easily_Whether you are planning a home upgrade or you are dealing with a large commercial project, there are certain times when you might be required to remove the existing paint from one or more walls.

While some believe this to represent a labour-intensive project, the fact of the matter is that appreciating the steps taken by professionals will enable you to maximise your efforts.

Let us, therefore, examine some expert recommendations in order to provide a bit more clarity.

Choosing the Right Paint Stripper

The best way to remove paint without damaging the underlying wall is to employ the best paint stripper for the task at hand. Strippers generally fall into two categories:

  • Solvents and mineral spirits
  • Caustic mixtures

In the majority of cases, solvents will do the trick without causing the wall itself any damage.

However, you might need to utilise caustic paint strippers when dealing with multiple layers of paint (these can be more stubborn to address with solvents alone).

Be sure to read the user instructions as well as the indications of each category in order to understand which is the most logical option.

Dealing with Wooden Elements

There are times when you might also be required to remove paint from wooden elements associated with the wall (such as crown and chair mouldings).

In these instances, appreciating the different types of wood and their qualities is important. Harder woods such as oak and walnut tend to stand up to mechanical scraping actions.

However, soft materials including pine and cypress should be handled with care.

What Tools Will You Need?

A standard six-inch putty knife or paint scraper will be necessary along with a handful of rags to soak up any excess stripping fluid.

Drop cloths could also be a good idea in order to protect floors and nearby furniture.

If you happen to be dealing with a very large area or when working at heights, it is always wise to speak with the team at Premium Door Stripping.

We provide a variety of reliable services and we are capable of handling even the most daunting of tasks.

What are the Most Effective Ways to Remove Paint from Copper?

What are the Most Effective Ways to Remove Paint from Copper

What are the Most Effective Ways to Remove Paint from CopperThere are several ways to remove paint from metal. Some involve mechanical methods (such as a rotary disc sander) while others may employ harsh chemicals including acetone and alcohol.

However, certain metals require a more delicate approach. This is often encountered with copper due to its relative softness when compared to iron and steel.

So, how can you effectively deal with stubborn layers of paint without damaging the underlying surface?

Let’s take a look at the step-by-step guide found immediately below in order to fully understand the process.

Initial Preparation

It is first important to loosen the paint from the surface as much as possible. The good news is that this can normally be accomplished by placing a few drops of olive oil over the affected area. Let this oil sit for a few minutes before beginning the removal process.

The Use of a Putty Knife

You will then need to purchase a paint stripper for cars. This kit normally contains a plastic putty knife that can be used upon softer materials such as copper.

It is still wise to cover the leading edge of the putty knife with a soft rag before scraping. This will further help to minimise any unintentional damage to the underlying copper.

Mineral Spirits

If you come across paint that is more difficult to remove (such as paint that is located within cracks or crevasses), use a small amount of mineral spirits on the affected area.

Allow these spirits to sit for a few moments before dislodging the paint with a knife. This process might need to be repeated when dealing with multiple paint layers.

If you are still uncertain about the methods outlined above or if you happen to be tackling a more challenging project, it is best to contact the team at Premium Door Stripping.

Our technicians boast a great deal of expertise when dealing with copper, wood, aluminium, and countless other surfaces. This will ensure quality results within a fraction of the time that might otherwise be required.