Tips on How To Fix a Cracked Wooden Door

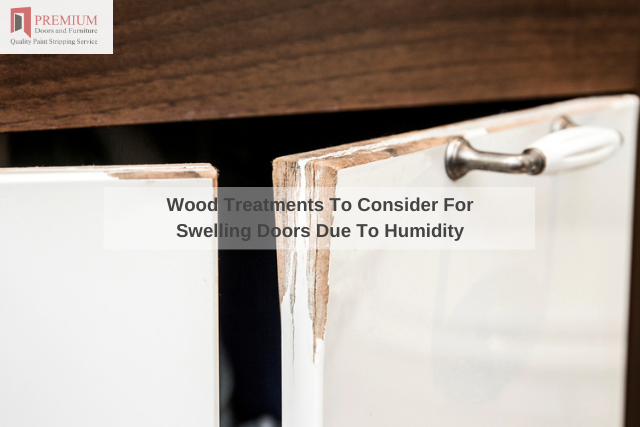
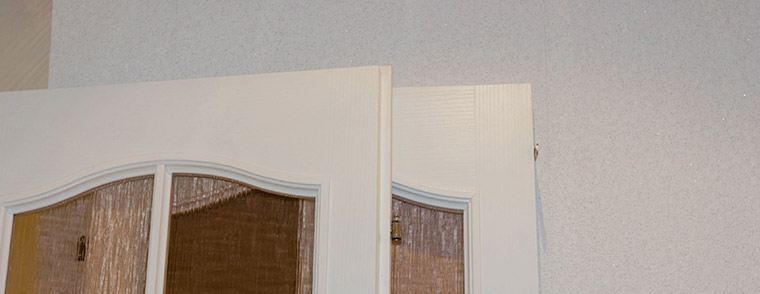
A common and frustrating problem homeowners face is a cracked wooden door. The fix for this is often just as easy as the problem itself! Common causes include mechanical damage or temperature variations (particularly if the door is found on the exterior of your home).

However, many cracks can be repaired in order to avoid a more costly replacement.

What does this process involve? Let us quickly examine some professional suggestions.

Remove the door from its hinges

The first step of the process is to remove the door from its hinges. This makes it easier to work on and also allows it to be stored away until the door can be re-hung.

Never forget to take some photos of your doors’ pre-repair state – this will allow you to easily replace your door should there still exist any issues at a later date (i.e. if the same problem occurs again).

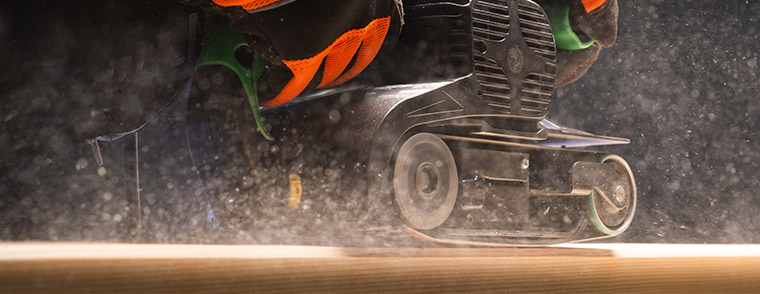
Sand down the damaged area

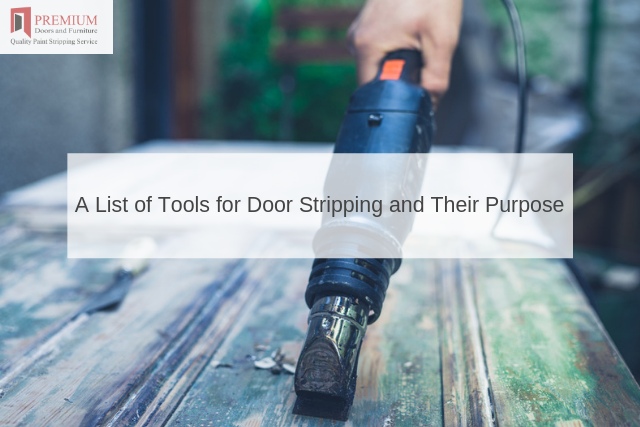
Using a belt sander, carefully sand down the damaged area to ensure it is as smooth as possible. This will also remove any splinters that may have formed due to previous splits in the wood.

Always wear protective gloves as well as safety glasses when using a belt sander. You should also clear away all nearby items to prevent them from being damaged.

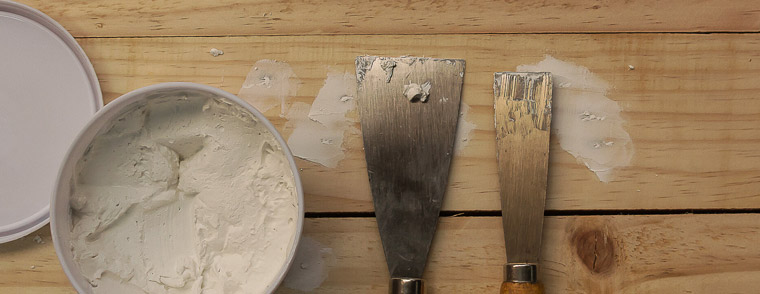
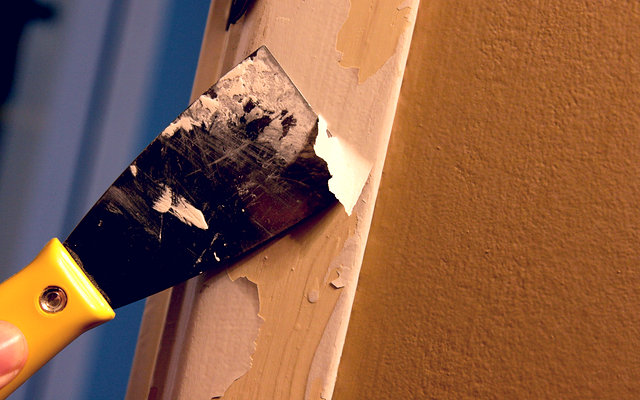
Apply wood filler over the cracks in order to fill them in

Once you’ve sanded the door down, wipe it down with a damp cloth so it is nice and clean. Then apply wood filler over any cracks to fill them in – make sure not to over-do this as too much can cause you more work later on!

There is a wide range of wood filler available to buy from most DIY shops and online home improvement retailers.

You should apply the wood filler with a putty knife until it is smooth and levelled. Allow it to dry thoroughly for at least 24 hours.

Sand again with a belt sander

To achieve that smoother finish, sand the door again with a belt sander – this will remove all of that excess wood filler and ensure you have an even surface to start working on.

Apply the belt sander to the edges to ensure that they are smooth. To achieve this it may be easier to prop up the door with a few spare 2x4s and sander them until you’re happy with the finish.

For any paint stripping or restoration of your wooden doors, get in touch with us here at Premium Door Stripping. We specialise in restoring the beauty and integrity to all types of wood. Contact us for more information on how our services could help you preserve the natural beauty of your property.

How Paint Stripper Affects Your Car

Why paint stripper is also used to spoil motor vehicles

Paint stripper blog post image.
Thankfully, none of our paint strippers would have this effect on your vehicle, as the solvent base is lower on paint stripping agents for doors and furniture. Image by Charnsitr (via Shutterstock).

For car owners, paint stripper is a must-have tool for removing old layers of paint from the car. It’s important to know how it works and what you need to do before using it, so your car doesn’t get damaged in the process. In this blog post, we’ll discuss how paint stripper affects your car – and more importantly – what you can do to protect it!

How does paint stripper affect your vehicles?

In a nutshell, the paintwork of your beautiful motor disappears but it varies on the type of stripper you use.

If the car paint stripper is not removed, it can cause corrosion of surfaces. Paint will be discoloured and peeled off in chunks after a period of time with exposure to heat and rain or any other form of moisture.

If you want to use this product on your car, apply it when the vehicle has cooled down for at least 4 hours after being driven. Do not apply the car paint stripper on a hot vehicle and allow it to dry for at least 24 hours.

Alternatively, the automotive paint stripper can be used by any professional or DIY car enthusiast if they want to remove old layers of paint from their cars. This is usually done as an initial preparation before painting your vehicle with a new coat of gloss, body paint, filler or any other product.

The car paint stripper is not as effective on vehicles that are well maintained and have a glossy coat of polish, but it can be used cautiously to remove old layers of dirt and grime from the surface if desired.

Protecting Your Vehicle

To protect your vehicle before stripping the paint from the body, you should cover the car in an old sheet or make sure the car is well-ventilated. Non-metal parts of the car should also be covered with an old sheet or newspaper to protect them from the paint stripper.

The car paint stripper should never come in contact with rubber seals or grommets as these areas can erode and become brittle over time. Old brake fluid is another aspect of your car that you want to protect.

Safety Tips

When using an automotive paint stripper, always read and follow all instructions on the label carefully before applying this product to any surface.

Do not use a car paint stripper if anyone in the house is pregnant or has an allergy to isopropyl alcohol.

We know you’re looking for the best way to remove paint from your car. With this blog post, we wanted to provide a comprehensive guide on how and why paint stripping chemicals affect cars so that when you need professional help with it, you can partner with our team of experts at Premium Door Stripping who will safely apply these chemicals without damaging your vehicle. Have any questions? Let us know!

How to Remove Command Strips from Wall Without Peeling Paint

Command strips can be beneficial during wall decoration as they enable you to hang pictures and other objects without harming your wall. However, if not removed carefully, the can result in peeled paint, sticky patches with leftover residue and in some cases, cracks in the wall.How to Remove Command Strips from Wall Without Peeling Paint

At Premium Door Stripping we offer professional command strip removal services for you. The following are some of the ways you can remove command strips from your wall without peeling off the paint.

Stretching

Command strips function the way they do because of the level of cohesive and adhesive forces.

Some use the two-piece hook and loop system where one side holds to the wall and the other onto the hanging object.

To remove these command strips, you must first remove the hanging object to expose the command strip’s adhesive segment.

To do this, hold the lower part of the object and remove it from the strip in an ascending manner.

Once the adhesive part is exposed, hold the exposed section and gently stretch it in a similar path as the strip.

Heating

You can also use a heat gun to warm up the command strip before scrapping it off the wall. Hold the heat gun a few inches from the command strip while moving it from side to side for about 30 seconds.

Once the command strip turns warm, you can hold on to the pull tap and pull. If it’s pull tap is broken, use dental floss to disintegrate it from the wall.

Slide the dental floss under the strip and, in a back-and-forth movement, saw through the bottom of the strip to disintegrate is from the wall.

Varnish Removal

Another technique is using liquid or gel varnish remover to weaken the command strip adhesive.

First, brush the stripper on the wall to soften the adhesive. Using a paint scraper, scrape off the command strip before the chemical dries off.

It might leave your wall with a small stain that can easily be wiped off using a damp rag. It is advisable to use the manufacturer recommended method to rinse the remover if necessary.

6 Pro Tips For Painting Your Home Interior

Most of us have an idea of how to prepare for and paint our house interiors. 6 Pro Tips For Painting Your Home Interior

While it seems an easy task, having a perfect outcome needs professionalism. Below we have prepared pro tips to make your work easier, work like a pro and have a more attractive result.

1. Have the Right Requirements

Before doing anything, you must ensure you need everything the job needs. Choose the colours you want, sandpaper for scraping, a drop cloth, premium door stripping to strip paint off the door and all other requirements. Having everything helps your work go smoothly.

2. Prepare the Surface

The surfaces on which you are to paint need preparation for a perfect finish. Scrape off the old paint, patch and feel up the holes and dents on the walls. Even though it is the least interesting part of the job, it is imperative. Apply premium stripping in removing varnish from wood.

3. Prime the Surfaces

Applying a primer to new walls or dark painted surfaces before painting is as important as the paint itself. It improves paint adhesion while preventing stains from passing through. To hide the primes wall, tint the primer nearer to the finished colour.

4. Use Canvas Drop Cloths

While using plastic drop cloths is a cheaper option, going for canvas drop cloths is advisable. It lasts over a lifetime, and unlike plastic, it absorbs the dropped paint. They are easily folded and can fit around doors and corners.

5. Use Paint Grid and Extension Pole

Instead of going for a ladder use extension poles for your roller. Look for one with good grip. Metal threaded ends are a sure advantage. Use a paint grid to deal with excess paint from the roller. It is easy and neat

6. Don’t Wash Your brushes or Rollers

If you don’t finish the job in a day avoid washing the brushes for overnight storage. Wrap them up in plastic bags or tin foil and put them in a refrigerator. It prevents the paint from drying up. Let them warm up for around thirty minutes before using them the following day.

Preventing Swollen Wooden Doors: Effective Treatments and Preventive Measures

High humidity poses a significant challenge for wooden doors as they tend to absorb moisture from the air, resulting in swelling. This swelling necessitates door repairs and a fresh coat of paint.

However, by implementing appropriate treatments and preventive measures, you can effectively address the problem, ensuring the doors remain in optimal condition while minimizing the risk of unnecessary losses.
Wood Treatments To Consider For Swelling Doors Due To Humidity

Treatments for Swollen Doors

Sanding: Smoothing the Surface

Sanding is a crucial step in door maintenance, involving the use of sandpaper or sand to polish and smoothen the door’s surface.

This process is particularly important before applying a new coat of paint. Sanding serves the purpose of closing any pores on the wood, preventing moisture penetration during periods of high humidity.

Chemical Wood Stripper: Safely Removing Paint

If the door is already painted and becomes swollen, a chemical wood stripper should be used to safely and carefully remove the paint without causing damage to the wooden door. This process ensures that the door is ready for further treatment or repainting.

Preventive Measures for Swollen Doors

Dehumidifier: Regulating Humidity Levels

Using a dehumidifier is an effective solution for reducing and maintaining optimal humidity levels. This device absorbs moisture, preventing the door from absorbing excess dampness.

Notably, a dehumidifier consumes a minimal amount of energy and should be used with all doors and windows closed for maximum efficiency.

Sealer Application: Protecting the Wood

Applying a sealer is a protective measure that safeguards the wood from potential damage. The sealer creates a barrier, providing a protective layer to all parts of the door.

It is essential to apply the sealer thoroughly, paying special attention to the edges and faces, with a particular focus on the vertices. Multiple layers of sealer should be applied to ensure maximum protection against potential harm.

Heat Gun: Drying Out Moisture

To eliminate moisture trapped within the wood, a heat gun can be used effectively. By directing the heat gun towards the swollen areas, the moisture is evaporated, restoring the door to its original condition.

Conclusion

To maintain the quality and durability of wooden doors, it is crucial to implement preventive measures and treatments to address the issue of swelling.

By following these recommended approaches, you can significantly reduce the risk of damage and avoid unnecessary losses.

Remember to prioritize regular maintenance and take proactive steps to keep your doors in optimal condition.

An Overview of Sustainable Wood and Why it is Important

Although it is impossible to deny the appeal of wooden furniture, we need to keep in mind that entire forests have been levelled to create such items in the past.

This is why a growing number of firms are beginning to utilise sustainable sources of wood. Let us quickly look at some of the benefits associated with this approach, which species are the most common and why sustainable wood can make a great alternative in these modern times.

What is Sustainable Wood?

This type of wood is sourced from proactively managed forests. The main point is to ensure that harvesting materials will not disrupt the local ecosystems or negatively impact the wildlife population.

Perhaps most importantly, gathering wood from such forests helps to ensure that the trees will continue to grow; counteracting the effects of greenhouse gas emissions while providing a renewable source of oxygen.

What Types of Woods are Sustainable?

From a general perspective, wood is considered sustainable if it is associated with a fast-growing species. Here are some of the most common types of sustainable woods:

  • Oak
  • Mahogany
  • Fir
  • Bamboo

Not only are these woods quite beautiful, but they are sturdy enough to resist a fair amount of wear and tear.

Of course, there may be also times when you prefer to restore a piece of furniture which has been created from sustainable wood.

This is also why knowing how to clean wood after stripping paint and appreciating which chemicals are safe to use is quite important.

Choosing furniture that has been created from a sustainable wood source will help to protect the environment for generations into the future.

The professionals at Premium Door Stripping fully support this method, so please contact us if you have any other questions.

A List of Tools for Door Stripping and Their Purpose

Removing paint from a door or a window frame requires skill and experience. However, using the right tools for the task at hand is just as important. What are some items that should always be close by when tackling any type of stripping project?A List of Tools for Door Stripping and Their Purpose

Standard Pain Scrapers

These small tools are comprised of a short blade and a flat handle. They can be manipulated by hand in order to remove layers of paint from a standard surface.

A Wire Brush

This is often used when performing work on exterior surfaces. The somewhat flexible nature of the metal wires is also ideal when you need to get into tight spaces. However, wire brushes are rarely used when performing any type of finishing work.

Electrical Sanders

Belt and cylindrical sanders can be used to tackle challenging projects that might not be suited for manual removal techniques. The sandpaper can be purchased in a number of different grits depending upon the type of paint that needs to be removed. This is often one of the most important tools used by a professional door stripping service.

Heat Guns

A heat gun will often be used in conjunction with a scraper when removing paint. This often comes in very handy if you happen to be dealing with a delicate underlying surface, as the heat is capable of loosening the paint.

Power Washers

A power washer consists of a machine that emits a highly pressurised stream of water. This water can then ablate paint from the surfaces of outside objects such as decks and lawn furniture. Power washers are equipped with tips that provide various openings so that the stream of water can be adjusted to the appropriate angle.

These are some of the best “tools of the trade” to possess if you plan on removing paint from a surface. When combined with other materials such as the best varnish removers on the market, there is no doubt that even challenging projects can be quickly completed.

In Video: Antique Fireplace Restoration

How antique fireplace restoration is undertaken

Fireplace restoration image by Aleksandrs Muiznieks (via Shutterstock).
A newly restored antique fireplace can look almost as good as new. Image by Aleksandrs Muiznieks (via Shutterstock).

Situated in the delightfully named Holy Bones in the city of Leicester, Britain’s Heritage work in a similar field to our company. They not only work in the furniture restoration business: another area of theirs is reproduction furniture. Fireplace restoration is a main field of theirs. The company was founded by Jeff and Julie Dennis in 1980. Continue reading “In Video: Antique Fireplace Restoration”

Queen Mary Restoration Bid Sets Sail

Water jetting and paint stripping forms part of TS Queen Mary restoration

TS Queen Mary, heading to Greenock on the 15 May 2016.
Homeward Bound: the soon-to-be-restored TS Queen Mary, heading to Greenock on the 14 May 2016. Image by Dave Souza (Creative Commons License – Attribution-Share Alike).

The restoration of an iconic leisure steamer has been given a boost by the donation of specialist coatings. Thanks to a campaign backed by the Sunday Mail newspaper (Scotland’s equivalent to the Sunday Mirror), TS Queen Mary could be seen on the Clyde estuary again. AkzoNobel and Jotun donated the coatings which shall see the vessel restored to its former glory. Continue reading “Queen Mary Restoration Bid Sets Sail”