What are the Most Effective Ways to Remove Paint from Copper?

What are the Most Effective Ways to Remove Paint from Copper

What are the Most Effective Ways to Remove Paint from CopperThere are several ways to remove paint from metal. Some involve mechanical methods (such as a rotary disc sander) while others may employ harsh chemicals including acetone and alcohol.

However, certain metals require a more delicate approach. This is often encountered with copper due to its relative softness when compared to iron and steel.

So, how can you effectively deal with stubborn layers of paint without damaging the underlying surface?

Let’s take a look at the step-by-step guide found immediately below in order to fully understand the process.

Initial Preparation

It is first important to loosen the paint from the surface as much as possible. The good news is that this can normally be accomplished by placing a few drops of olive oil over the affected area. Let this oil sit for a few minutes before beginning the removal process.

The Use of a Putty Knife

You will then need to purchase a paint stripper for cars. This kit normally contains a plastic putty knife that can be used upon softer materials such as copper.

It is still wise to cover the leading edge of the putty knife with a soft rag before scraping. This will further help to minimise any unintentional damage to the underlying copper.

Mineral Spirits

If you come across paint that is more difficult to remove (such as paint that is located within cracks or crevasses), use a small amount of mineral spirits on the affected area.

Allow these spirits to sit for a few moments before dislodging the paint with a knife. This process might need to be repeated when dealing with multiple paint layers.

If you are still uncertain about the methods outlined above or if you happen to be tackling a more challenging project, it is best to contact the team at Premium Door Stripping.

Our technicians boast a great deal of expertise when dealing with copper, wood, aluminium, and countless other surfaces. This will ensure quality results within a fraction of the time that might otherwise be required.

How To Remove Spray Paint From Metal?

How To Remove Spray Paint From Metal_

How To Remove Spray Paint From Metal_

Removing paint from different surfaces will often require the use of unique methods. One example is you happen to need to strip paint from a metallic surface. Unlike wood, this task can be a bit more intensive.

This is why appreciating some of the options at your disposal is always a good idea. Let’s take a look at two processes that are often employed by professionals so that you can make the most appropriate decision.

Mechanical Techniques

There are times when a rotary disc sander can help you remove spray paint from metallic surfaces. However, the normal sanding disc will need to be replaced with a wire brush mechanism.

If you are working on a more intricate surface, then the use of this tool is often not practical. Let’s say that your goal is to strip paint from metal fencing. This means that it will be impossible for you to employ larger equipment in order to do so successfully.

For projects such as radiator paint stripping, then you will need to use small tools. This includes items such as hand-held wire brushes, grinding stones and even special scouring pads.

When working on car paint stripping, there are times where it can be difficult for you to remove the top layer of metal finishings by using other types of equipment because they lack precision control.

Chemical Alternatives

In order to access hard-to-reach areas, it could be prudent to use acetone. This is a liquid paint and varnish remover which should be able to deal with most materials.

Acetone is a chemical solvent that is available from a number of retail outlets. This includes hardware stores and supermarkets as well as online shops.

Acetone can be used to remove paint from some types of metal surfaces, although it may not work on all coatings. It is worth mentioning that acetone fumes are dangerous.

Therefore, this should be used in a well-ventilated area. It is also best to wear gloves when working with acetone and it’s advisable not to use the substance on painted or varnished surfaces as these can become damaged through contact with this type of chemical solvent.

To remove spray paint from metal with this chemical, place the object in a bucket containing the acetone and leave it for approximately an hour. The item should then be removed to check whether all the paint has been softened sufficiently so that it will come off easily with some gentle rubbing using steel wool or fine wire wool.

If you are still having issues in removing the paint, then contact a professional paint stripping company like Premium Door Stripping who deal with this task on a day to day basis and will be able to easily remove the paint for you.

If you’re still having trouble removing the paint, then contact a professional stripping company like Premium Door Stripping who deal with this task on daily basis and can easily get rid of it for you.

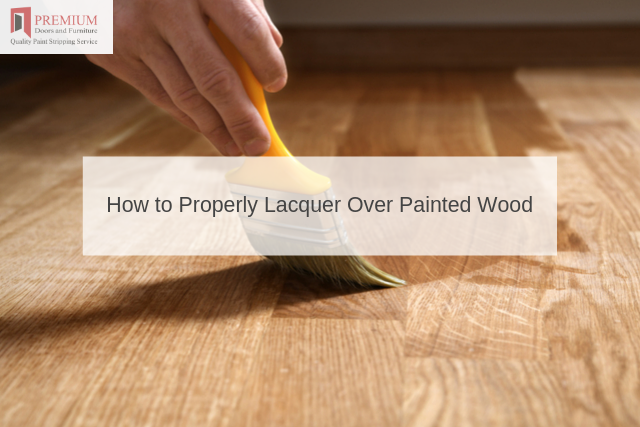
How to Properly Lacquer Over Painted Wood

How to Properly Lacquer Over Painted Wood

How to Properly Lacquer Over Painted WoodThere are times when you may wish to provide a section of wood (such as a door or a window frame) with an extra level of protection and style.

Lacquer can be an excellent option to consider due to the fact that it is waterproof and will help to keep the underlying surface intact. Still, there are a few factors to take into account in order to successfully complete such a project.

Oil or Latex Paint?

It is first critical to point out that lacquer cannot be placed over oil-based paints; it will not adhere properly. Only latex-based paints are suitable for such a project. If oil paint is present, you have two options:

  • Strip the paint away to expose the bare wood.
  • Prime the oil paint so that it can be painted with a top coat of latex. Lacquer can then be applied.

If you suspect that there might also be varnish present, be sure to purchase the best varnisher for wood. The lacquer can then be applied with ease.

The Finish of the Paint to be Lacquered

Assuming that you are planning to lacquer latex-based paint, determine whether its surface has a sheen (such as glossy or semi-gloss formulations). If this is the case, the surface will need to be lightly scuffed with sandpaper.

The elasticising agents will otherwise cause the subsequent coat of lacquer to adhere unevenly; leading to an alligator-like texture.

The Proper Application Techniques

Use a brush that is specifically designed for lacquer (most of these are equipped with synthetic bristles). Apply the lacquer in even strokes to ensure a uniform coating.

Try not to stop midway, as this will cause lap marks when the surface dries. Most wood items will require only a single coat and the majority of lacquers will be required to dry for at least 24 hours before they can be handled again.

To learn about other unique DIY tips, be sure to speak with a specialist at Premium Door Stripping.

How To Weatherproof Vintage Leaky Wooden Doors

How To Weatherproof Vintage Leaky Wooden Doors

How To Weatherproof Vintage Leaky Wooden DoorsWhile there is no doubt that vintage doors are known for their character as well as their unique aesthetic beauty, they can also become victims to the elements if not properly maintained.

This is why the concept of weatherproofing is important. What are some basics steps to take so that your door will be protected from the outside weather?

Insulation and Caulking

You will first need to remove the trim around the top and sides of the door frame. Purchase a can of spray foam.

Insert the nozzle into any visible gaps and fill them with the foam. As this foam expands, some may have to be shaved away before reattaching the peripheral trim.

You may also wish to caulk the sides of the trim in place (on both the interior and exterior sides). Be sure that this caulk is designed for exterior use. If you notice any cracks on the surface of the door (such as within the inlays), these can also be caulked.

In the event that the door is bare wood, try to encounter a caulking agent that closely matches the original colour and be sure to wipe away any excess before it dries.

Replacing Weatherstripping

In the event that old weatherstripping is present, pry it away with a screwdriver or cut it away with a utility knife.

Replace this weatherstripping with a more recent version; cutting each section to the appropriate length before tacking it to the door frame.

Before these strips are permanently in place, close the door to ensure a tight fit and that no areas are overlapping.

Door Sweeps

Some exterior doors have sweep that is found along the bottom portion. If you notice that the sweep has become damaged, it can simply be removed and replaced. However, you may need to drill new holes in order to keep it firmly in place.

For more maintenance advice or to learn about options when restoring the finish of antique doors, please take a few moments to contact Premium Door Stripping. You will be amazed with the options at your disposal.

Caustic Or Solvent Stripping?

Caustic Or Solvent Stripping_

Caustic Or Solvent Stripping_Best Solution for stripping tired paintwork

With house prices in the UK constantly rising it is difficult for countless people to buy a house decorated in the style that meets their full requirements. A beneficial option is to buy a cheaper house that requires renovating. This option makes it possible to create that perfect house.

The downside to this option is that depending on the house there could be a substantial amount of work that could take a quantity of time.

One of the greatest time-consuming jobs with this option is the removing of the timeworn wallpaper and paint.

Skirting boards, fireplaces, built-in furniture, Radiators, wooden shutters, and Doors are all desirable Architectural features that lots of people love to keep as they help to define the character of the property.

However, the majority of these will potentially have numerous layers of paint. Preparation is the key to effective decorating. Simply painting over critically damaged paint will normally provide unsatisfactory results.

The solution is to strip all the existing paint. Once the removal of the paint is complete options are available to create the desired finish. Wooden doors especially often have beautiful wood grain that waxing, polishing, or staining will enhance.

How to remove old paint

For painted surfaces, there are a range of solvent and caustic based products available. Sanding and heat are also a useful option if there are not too numerous layers of paint.

Solvent-Based Paint Stripping

Solvent-based paint removers affect the bond between the painted object and the paint. Once disrupted the paint swells and lifts from the surface allowing the removal of the material without damaging the original surface.

Caustic Soda Paint Stripping

Caustic paint strippers contain different chemicals that remove the paint differently. The chemicals react to the oily ingredients in the paint and break it down allowing its removal.

What Type of Paint Stripper to Use?

The best product to use depends on the surface and the type of paint used on the surface.

  • Solvent-based removers are generally better at removing various layers of thick paint. They usually leave a respectable clean surface without any stains or damage.
  • Caustic soda paint stripping products are particularly useful at removing paint from areas that have detailing or moulding, but they can occasionally stain or mark the wood.

Disadvantages

Some disadvantages are worth considering before using either of these products.

  • Since they are dangerous to use extreme care to ensure that there is minimum skin contact is important.
  • Both products are extremely messy to use. The complete process, especially if there is a large area can demand a considerable amount of time.
  • Both products are expensive to use over large areas.

Other options

An option that is certainly worthwhile considering is the use of a professional company such as Premium Door Stripping. Based in Berkshire their service covers the majority of South West England. This company has a team of trained professionals that offer a high-quality stripping service to meet your requirements.

Consider these benefits before deciding to tackle the task yourself.

  • Hassle-free service.
  • No Mess.
  • Quicker than doing it yourself.
  • Considering time and products this service is often a cheaper option.
  • Collection and delivery service.

Dip and Strip Guide for Doors

Dip and Strip Guide for Doors

Dip and Strip Guide for DoorsThe dip and strip method of refurnishing wood and metal furniture involves first using a solvent or a heat gun to remove paint, rust, and other imperfections (dipping it) and then using a sanding tool to strip it down.

When done right, the result is a smooth surface that looks and feels brand new.

What we have here is a basic door stripping guide, with links to other posts on the blog that go into greater detail.

First, here’s what you’ll need:

  • tarpaulin sheets
  • trestles
  • a heat gun
  • a sander
  • a putty knife or metal scraper
  • an abrasive sponge
  • a mask
  • protective goggles
  • gloves
  • a sealable pot

For a more detailed explanation on some of these tools, check out this post.

Once you’ve got all your gear, here’s how to go about dippind and stripping the door.

Preparing the Door

Use your tarpaulin sheets to cover the floor underneath the trestles, and make sure the workspace is well ventilated (open the windows).

You’ve removed the door from its hinges, so now you can lay it across your two trestles. Make sure its completely stable.

Getting to Work—Dipping

Put on your protective rubber gloves, your goggles, and your mask, and turn the heat gun on -carefully- to about 200 degrees (570 Fahrenheit). Be extremelly careful with the gun as you melting the rubber gloves can cause serious injury.

Placing the nozzle at about 10 centimeters away from the surface of the door, and then tilting it to a 45 degree angle, you’ll notice that the paint, varnish, or whatever coating is on the door starts to bubble up. You don’t need to stay in one spot for more than 15 seconds.

Stripping

Use your putty knife or metal scraper to carefully remove the bubbled coating. If you notice that the heat gun hasn’t been enough to get straight down to the wood grain, then you might want to break out your eectric sander with 40 grit sandpaper. Start for the edges and move the sander towards the center of the door.

Use your abrasive sponge for the very final touches of the door stripping process. Once your done, cleanup thoroughly and keep the area ventilated. You’ll also want to avoid eating in the work area for a few days.

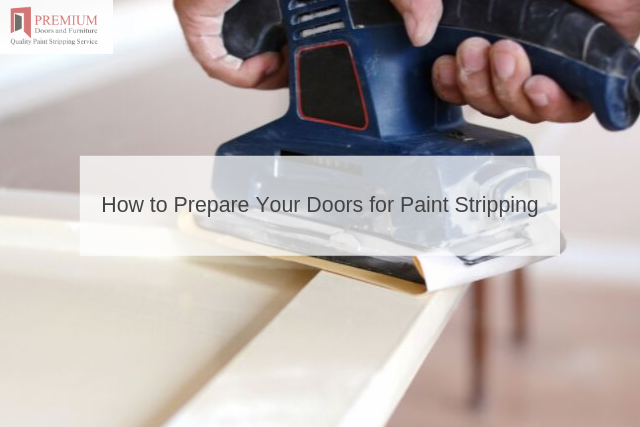
How to Prepare Your Doors for Paint Stripping

Do you wish to restore an antique door to its previous appearance? You might instead be looking to add an organic touch to your home by removing layers of paint which have existed for decades or longer.How to Prepare Your Doors for Paint Stripping

Not only is this a great option if your door happens to be rather valuable, but you will be amazed with the subsequent results.

If you hope to avoid any snags along the way, it is wise to prepare well before the stripping process actually begins. What are some steps to take and some factors to consider?

Glass and Hardware

While modern glass will not normally be damaged during the stripping process, the same cannot be said if your door happens to be more than 80 years old. Antique glass is often quite fragile, so it might be prudent to carefully remove any panes that may be present.

The same holds true if the hardware on the door happens to be original. These sections can easily be scratched or damaged.

It is much better to remove any hardware entirely as opposed to being forced to search for out-of-date accessories in the future.

Addressing Caulk and Silicone

Caulk and silicone are often used to seal cracks (such as within carved inlays or around glass panes). However, these can be unsightly once the stripping process has been completed. Most professionals suggest that such sealants be removed with a utility knife or similar stripping tool. This brings us to the final point.

Using the Appropriate Tools

There are specific tools which have been designed for stripping paint. Small wire brushes, portable heat guns, handheld scrapers, and electric sanders are examples.

It is also wise to possess a few screwdrivers, as the associated tips can be used to remove paint that might be present on the screw heads.

We should also mention that it is normally best to remove the door from its hinges and to lay it on a flat surface.

It will be much easier to access crevasses and more pressure can be applied if the door is parallel to the floor.

Anyone who would like to learn more about the stripping process itself or when it is best to seek the guidance of a professional should contact Premium Door Stripping. We are always here to help.

Finishing & Treating Options For Stripped Doors

Have you recently restored a wooden door back to its original appearance? While it is always possible to employ the professional services provided by a firm which offers door stripping in Bristol and other areas, you might be slightly confused in regards to what options are available after the process has been completed. This is why we will take a look at three possibilities to keep in mind; each offering its own unique benefits.Finishing & Treating Options For Stripped Doors

Solid Paint

Some homeowners will choose to strip a door before adding a few layers of paint. One of the main advantages of paint is that it will protect the underlying surface from any future damage.

You can also choose from a kaleidoscope of unique colour options in order to match the existing decor of your home. However, always keep in mind that paint will hide the natural grain and appearance of the wood in question.

Semi-Transparent Stains

One of the benefits to be enjoyed when stripping internal doors is that you will be able to apply a subsequent layer of semi-transparent stain. As the name hints, this option can be used to add a unique hue to the door while still maintaining the natural appearance of the wood.

Semi-transparent stain can also help to accentuate the grain; a nice touch if you are looking to achieve a more organic appeal. There are countless hues to select and it is best to employ a tone which matches the ambience of the room in question.

Lacquer

Lacquer is another option. Most lacquers are offered in oil-based formulations although it may be possible to obtain an acrylic solution. Lacquers are inherently waterproof, so they will prevent the wood from being damaged if a great deal of moisture is present.

Furthermore, it is possible to choose from a number of different finishes (such as high-gloss and semi-gloss variants).

These treatments are all viable options to consider. Each will add its own flavour and personality to your home.

Of course, you can always speak with a representative from Premium Door Stripping for more guidance or pro tips.

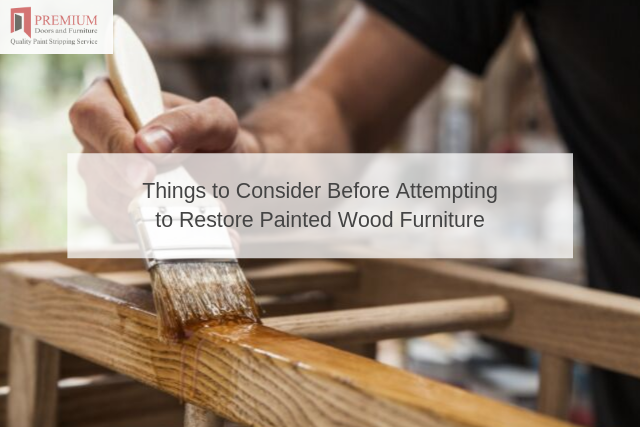
Things to Consider Before Attempting to Restore Painted Wood Furniture

Many individuals are keen to restore an antique piece of wooden furniture to its former glory. Not only will this allow the natural beauty to shine through, but such a process can dramatically increase the value of the item in question.Things to Consider Before Attempting to Restore Painted Wood Furniture

Still, such restoration may be rather tricky and damage can be caused if you do not take the appropriate steps. What are a handful of professional guidelines to follow and how can you ensure that the underlying wood is not unintentionally damaged?

Avoid Harsh Cleaning Products

It is first important to clean the area to be refinished. Many individuals tend to believe that harsh chemicals are the most appropriate solutions and yet, nothing could be further from the truth.

If anything, such solvents may damage the furniture. It is much better to employ a solution of warm water and dish soap. This will effectively remove any superficial dirt and grime.

Use the Correct Stripping Agent

Let’s assume for a moment that you are planning to remove paint from a Victorian-era door. While it is always possible to contact a professional and obtain the current door dipping prices, many DIY enthusiasts prefer a more hands-on experience.

Before attempting the process, you will need to take into account the type of stripping solution that is applied to the overlying paint. Always remember that some formulations might cause the wood to become damaged.

Others are designed for materials such as metal or porcelain. This is why you need to carefully read the label of the product before committing to a purchase.

Purchase the Right Tools

Stripping paint or varnish from wood will also require the appropriate handheld tools. While a flat scraper may be ideal for large surfaces, you might require smaller devices for crevasses and corners (such as inlays or chair rails).

Take a look at the intricacies of the piece in question in order to be prepared in advance.

Furniture restoration is as much of a science as it is an art form. This is why such a process should only be undertaken if you have taken the appropriate steps.

If you instead wish to leverage the experience of trained professionals, it is better to contact Premium Door Stripping and schedule a consultation.

6 Handmade Wooden Furniture Ideas

If you are looking to add a sense of organic personality to your home, handmade wooden furniture will leave a lasting impact. Let’s take a look at six DIY ideas to consider.6 Handmade Wooden Furniture Ideas

A Bespoke Headboard

Why not construct a headboard for your bed out of oak or maple? To add an even more stunning touch, upholstery can be included in order to match your sheets and pillows.

An Elevated Storage Bed

If you find that storage space within your bedroom is at a premium, building an additional section to house items beneath your bed such as shoes and clothes will add an extra sense of organisation.

A Handmade Sofa for Two

Why purchase a generic sofa when you can instead build one from scratch? This is a perfect project for novices, as the plans are generally simple and straightforward. You can then add pillows and cushions to match your unique tastes.

A Wooden Clothes Hamper

Have you grown tired of seeing clothes strewn around the house? One excellent way to remedy this situation is to create a wooden clothes hamper. You can choose the exact size and for a bit of aromatic elegance, it could be wise to work with cedar.

A Rocking Chair

This project could be a bit more challenging and yet, it is a great way to learn about the intricacies of woodworking. The good news is that the end result will be entirely unique and stunning to behold.

A Lattice Cabinet

You can also transform a traditional cabinet into a work of art by replacing standard doors with lattice inlays. If the cabinet is used to store clothes, this will also provide a greater amount of circulation so that stagnant smells can be avoided.

Do you have an old piece of wooden furniture and would you like to see what exists beneath untold layers of paint? If so, the experts at Premium Door Stripping can be of assistance. Do not hesitate to contact us when convenient.